Windows 7
Instructions to set up WLAN access under Windows 7
Note
Please note that the following instructions describe how to set up the Eduroam network using the CAT configuration tool.
When prompted for user data, be case-sensitive and enter your username (not an alias) including @uni-bremen.de.
For security reasons, the WLAN password is not the same as the password of your Uni account. Students set the
Password automatically when activating the Uni-Account, other users have to set up the WLAN password once in the onlinetools.
If you prefer manual setup, you will find manual setup instructions further down this page.
If there is a problem, please contact us by e-mail at wlan@uni-bremen.de.
Step 1
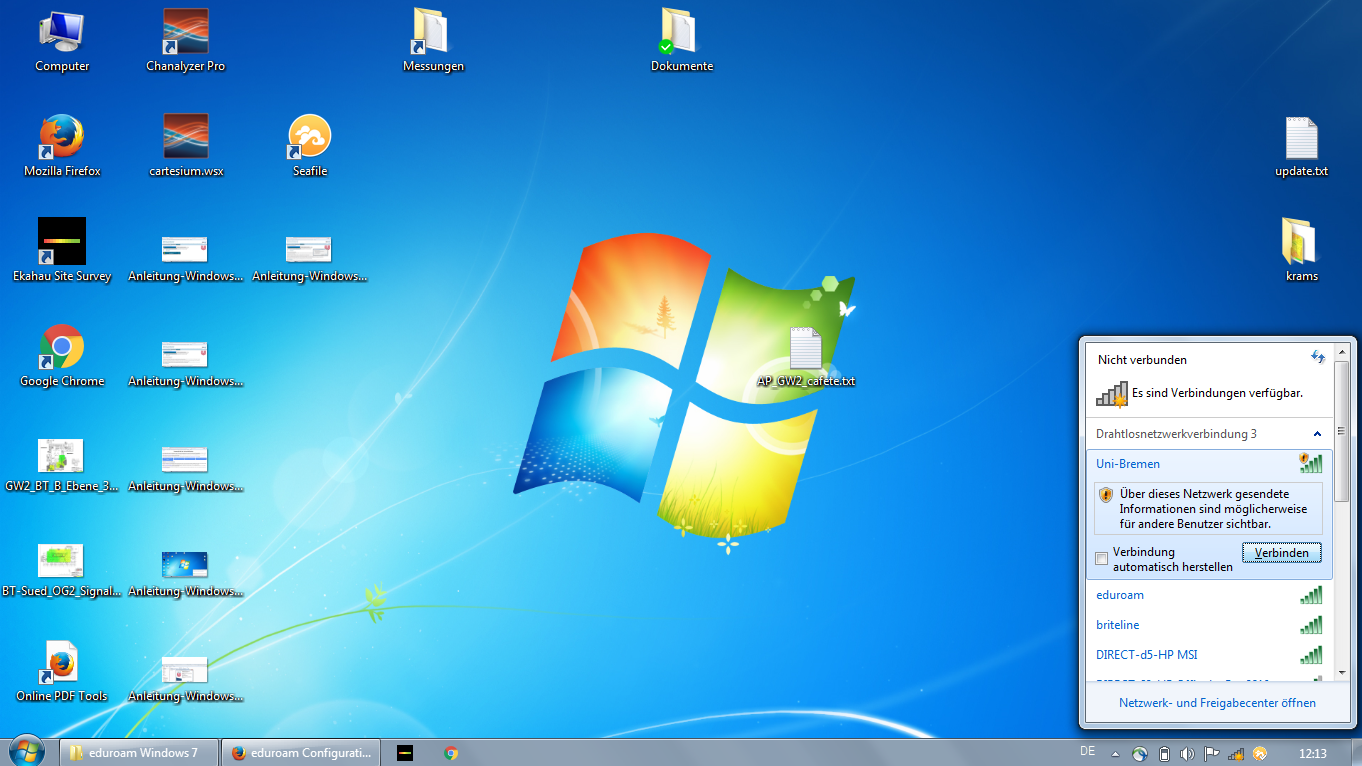
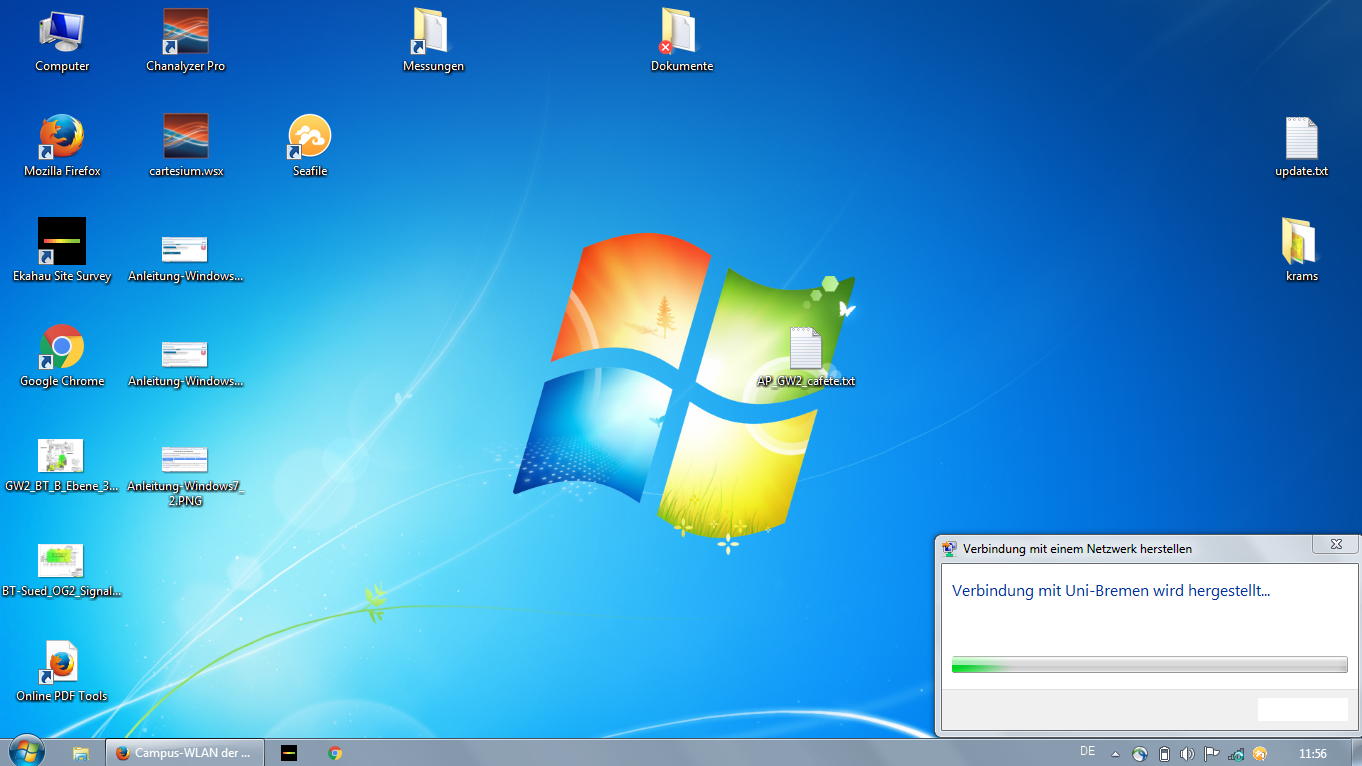
Step 2
A login window will open in your browser, click on the link to the CAT-Eduroam configuration tool or use the link wlan.uni-Bremen.de/cat.

Step 3
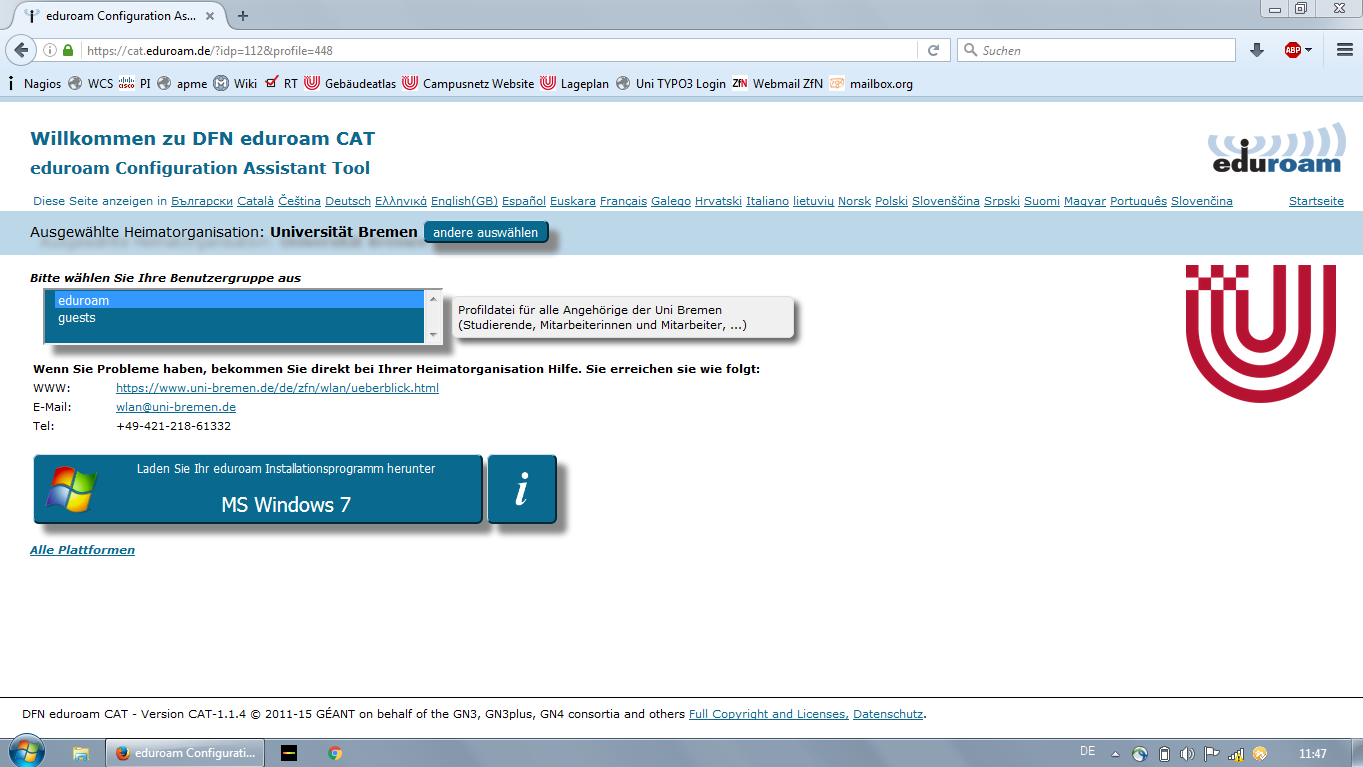
Step 4
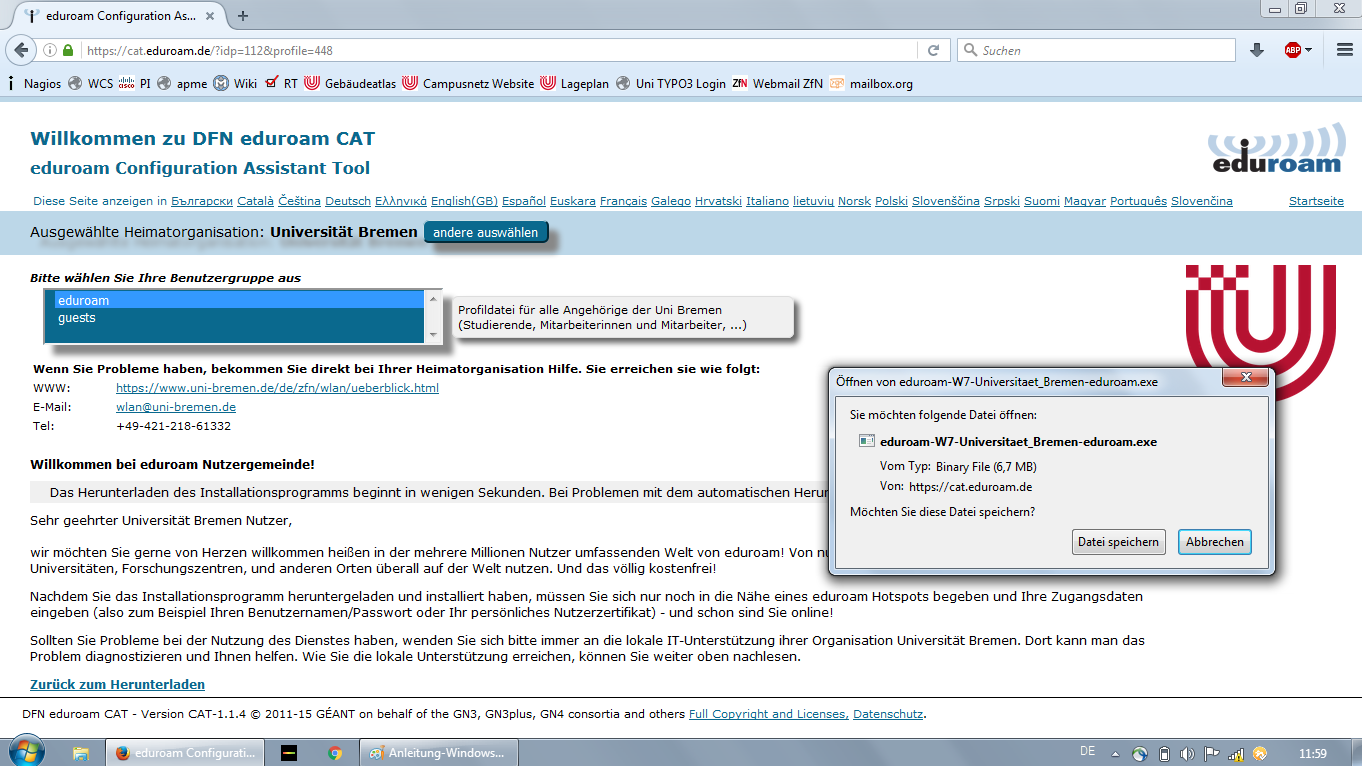
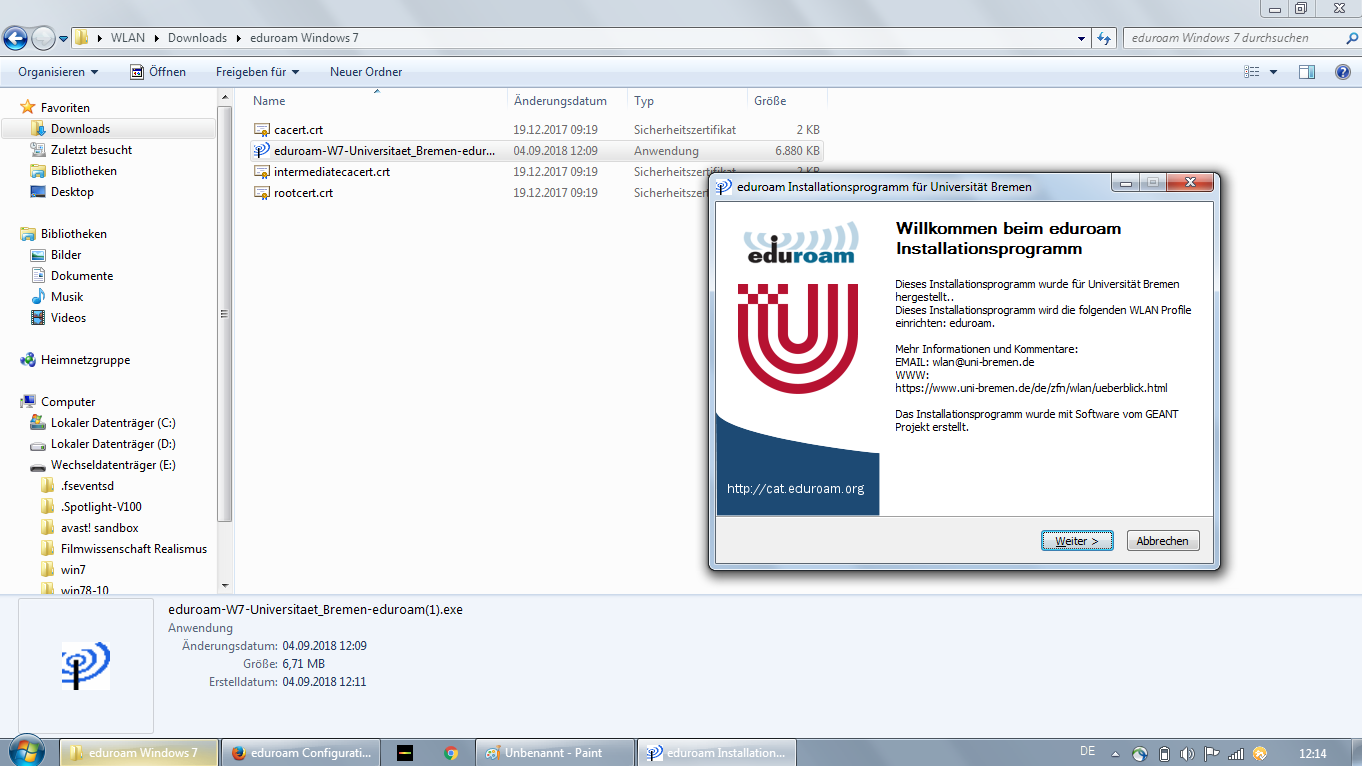
Launch the downloaded application (eduroam-W7-Universitaet_Bremen-eduroam.exe)
The installation starts, click on next
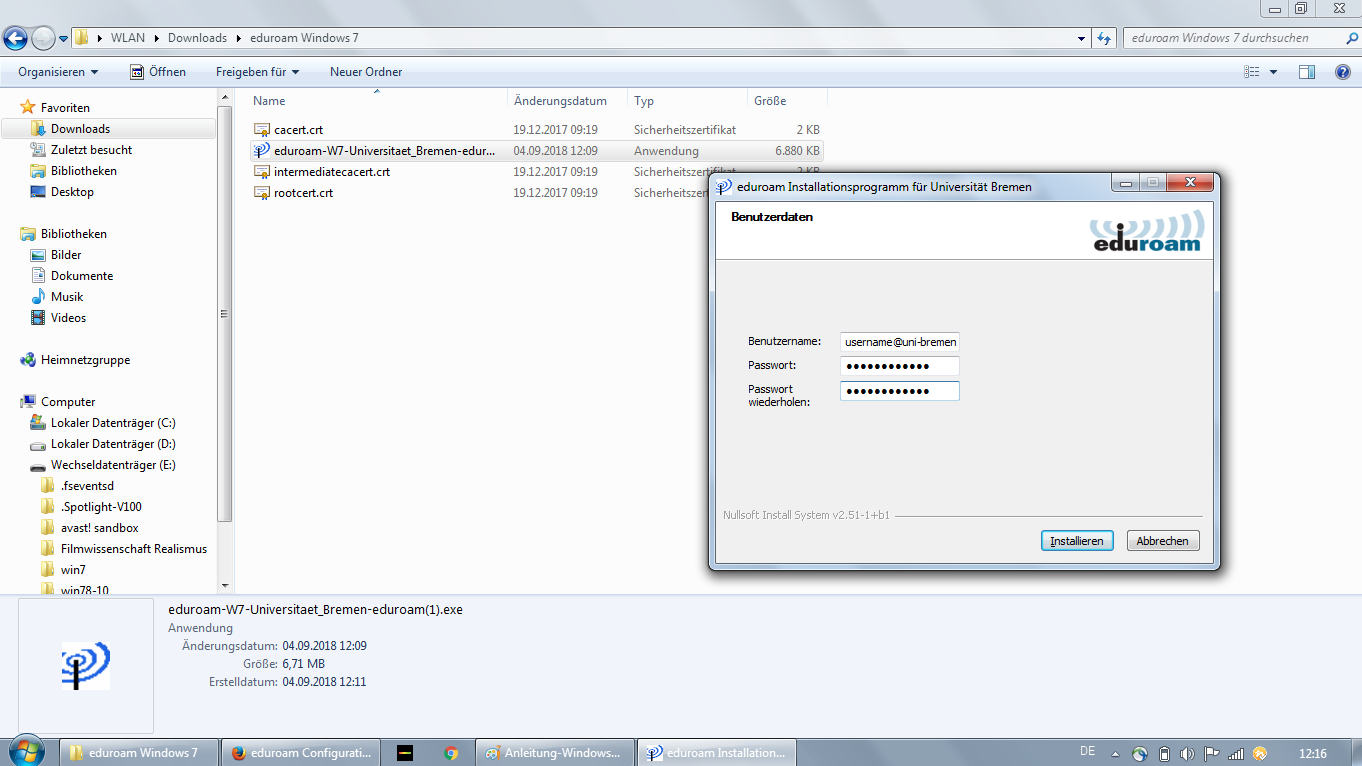
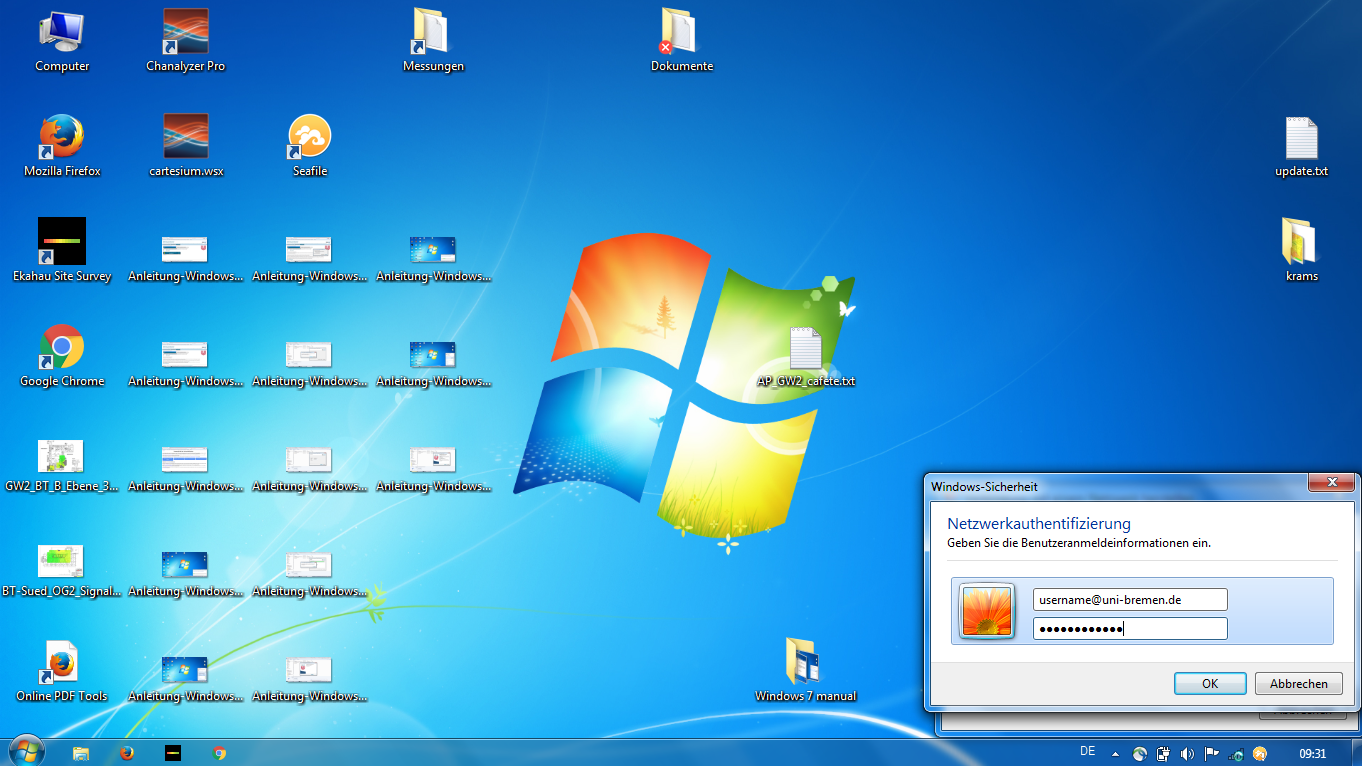
In the following window you will be asked for your login data for the Eduroam network, enter them in the form username@uni-bremen.de and the corresponding password and confirm your entries with Enter.
Step 5
Troubleshooting
If no connection is established, this can have various causes:
- The WLAN antenna of the notebook is deactivated. Usually, it is reactivated at the push of a button.
- If there is no access point with the eduroam network in the vicinity, the location must be changed.
If problems persist, our diagnosis page may be able to help.
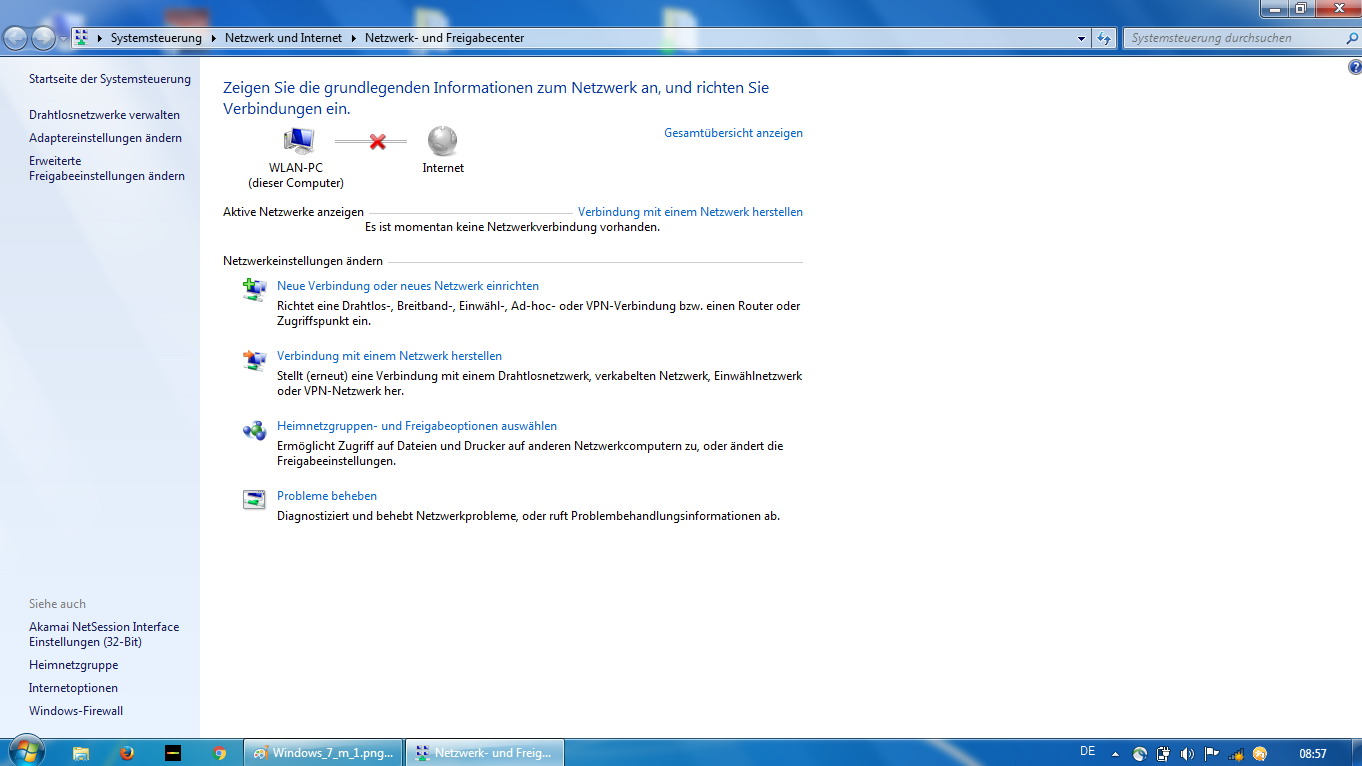
Instructions for manually setting up WLAN access under Windows 7
Step 1


Step 4

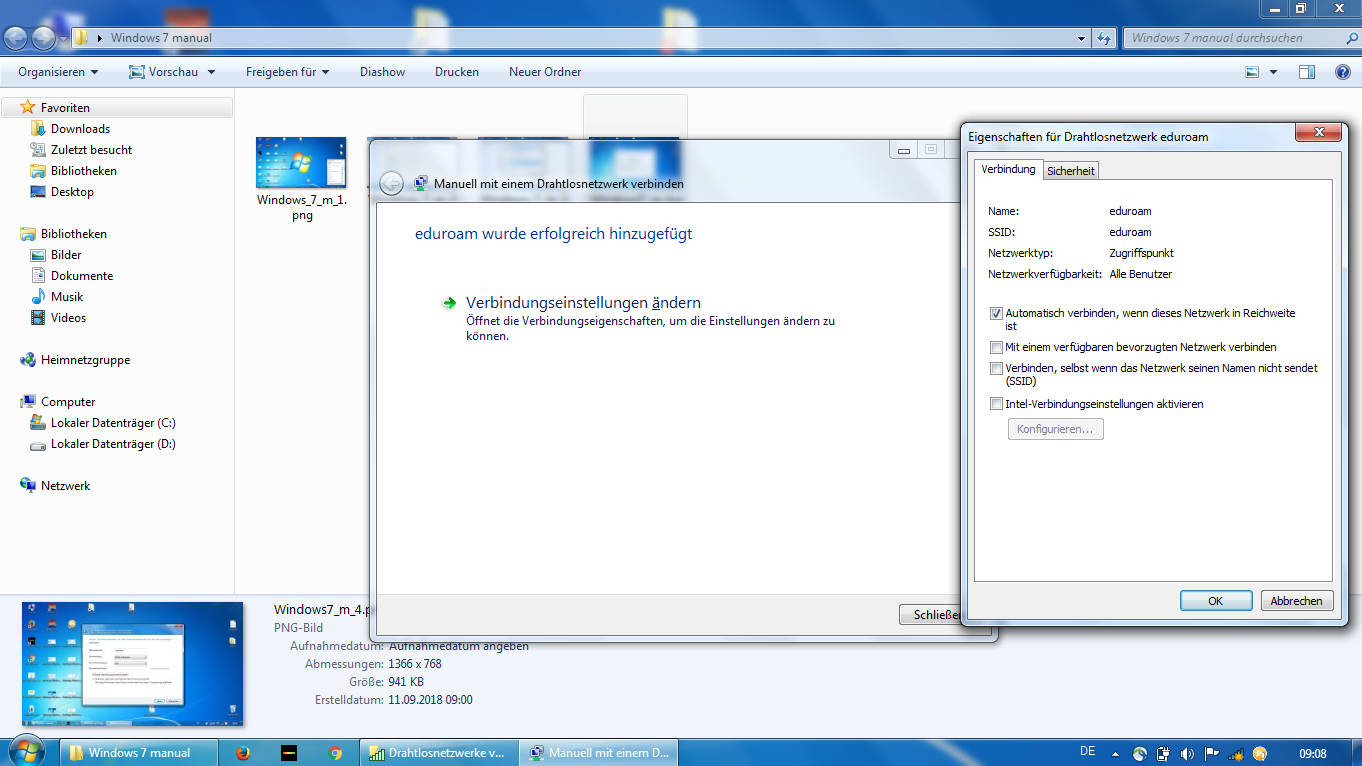
Step 6
Step 7
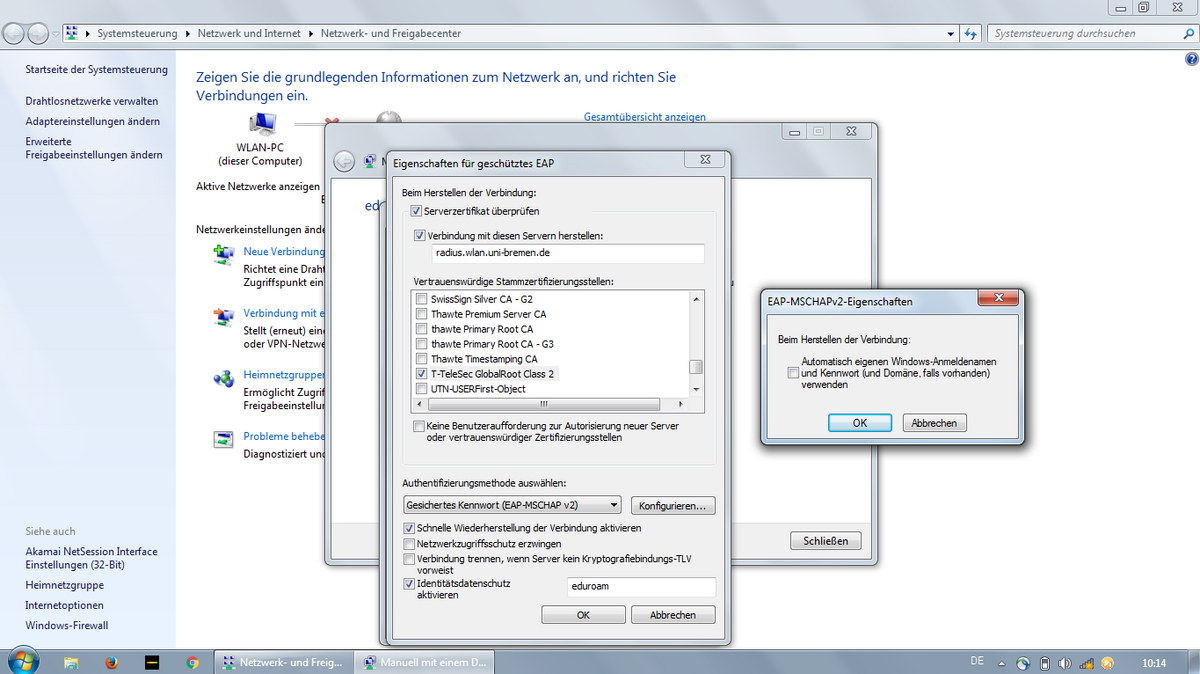
Check "Connect to these servers" and enter "radius.wlan.uni-bremen.de" in the corresponding field.
Check the box "T-TeleSec GlobalRoot Class 2".
For "Select authentication method:" click on "Secure password (EAP-MSCHAP v2)" and then click on "Configure...".
In the "EAP-MSCHAPv2 Properties" window, remove the check mark and confirm the dialog with "OK".
Finally activate the item "Activate identity data protection" and enter "eduroam" in the field behind it.
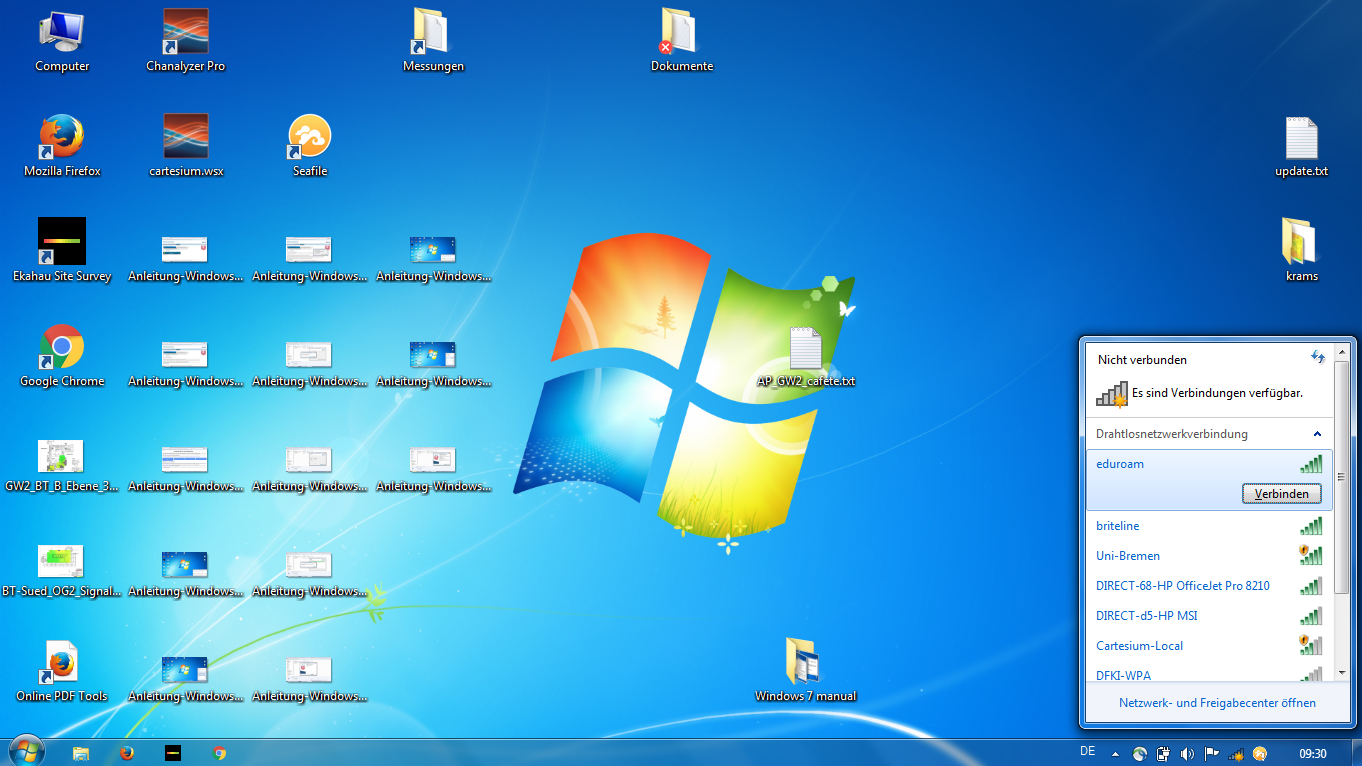
Step 8

Step 9
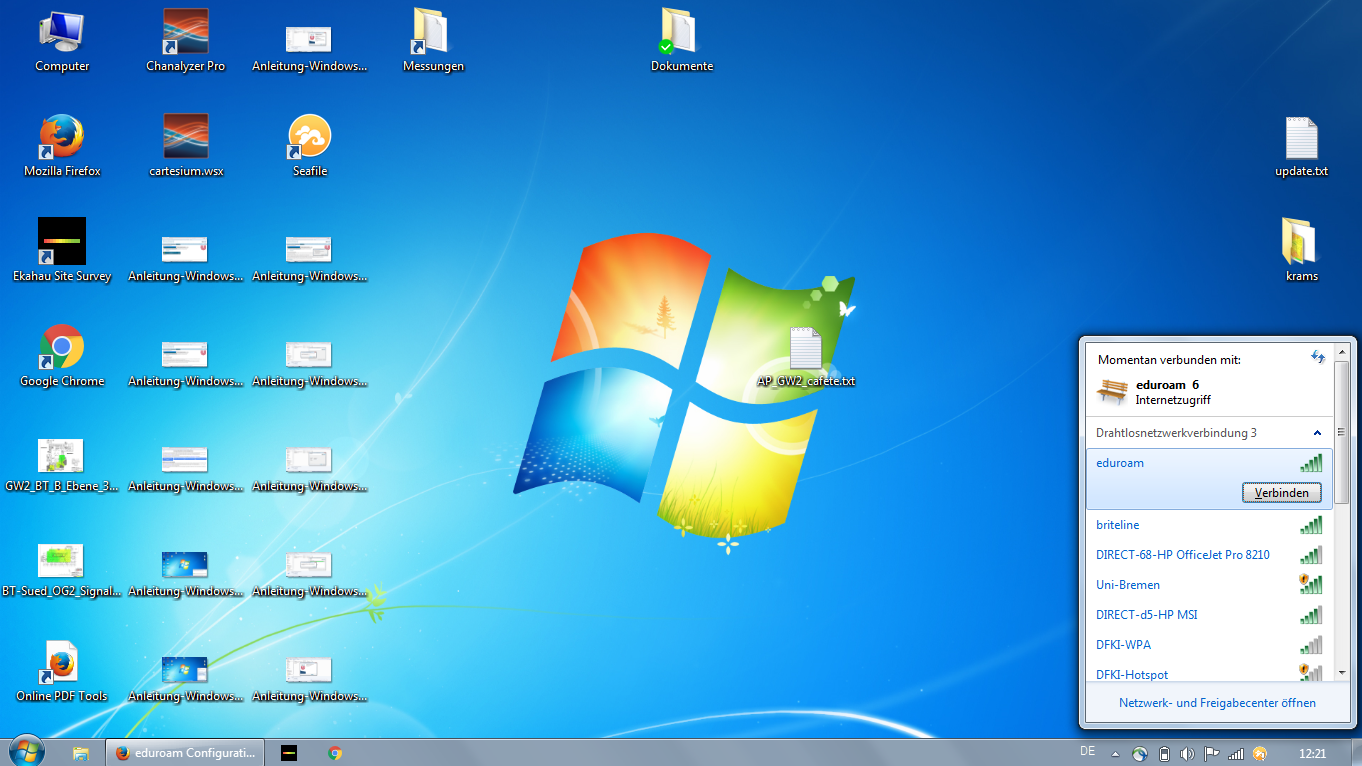
Click the Connection Manager icon again at the bottom right of the screen (see step 3), select the WiFi "eduroam" and then click "Connect". If a connection attempt has already been made, first click on "Disconnect" and then on "Connect" to make the changes effective.
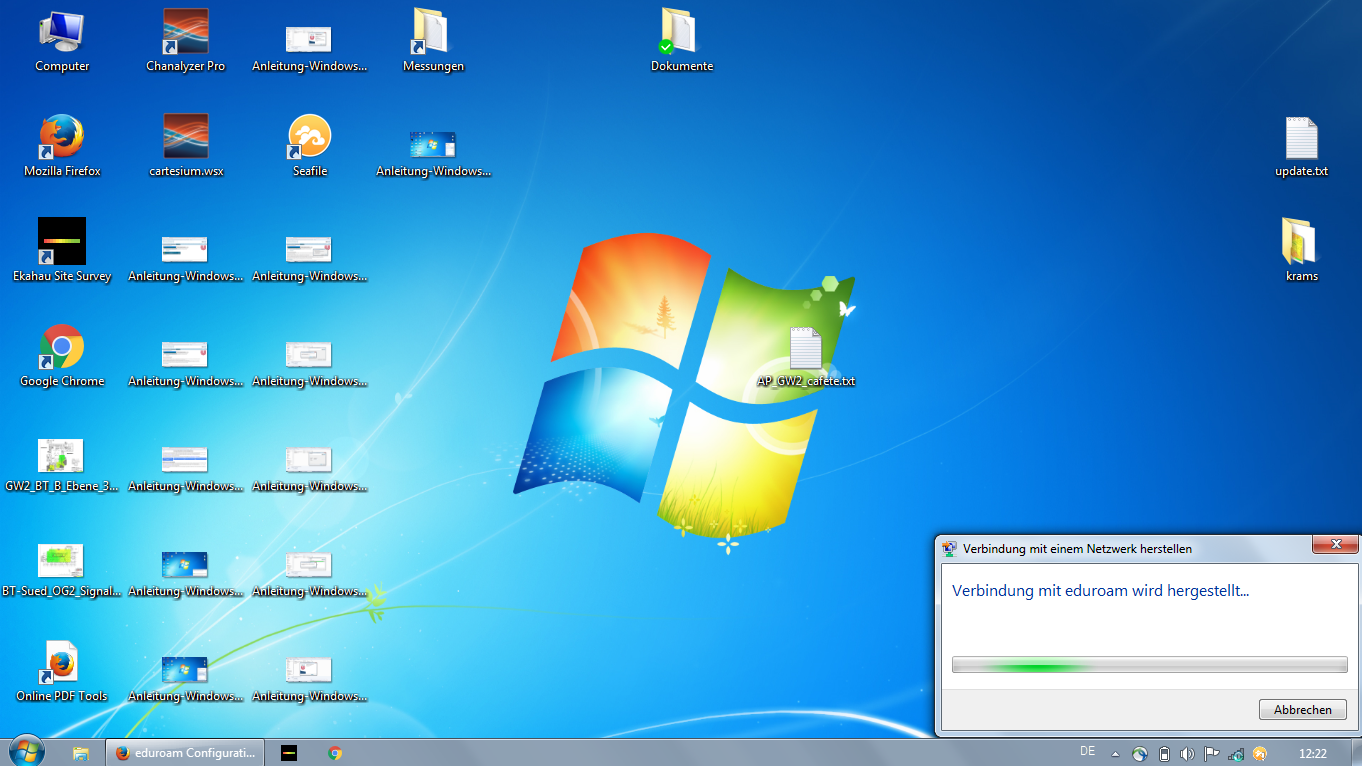
Now the dialog for entering the access data appears. Enter the user name of the university account followed by "@uni-bremen.de" and the WiFi-Password as the password. After a click on "OK" the connection should be established after a few seconds.
On some computers we have observed that user name and password have to be entered several times before the connection is established. Unfortunately, we have no influence on this peculiarity of Windows. If necessary, please enter your access data several times before you suspect another problem.
Step 10
If a query about the location of the computer then appears, you should select "Public Network" to not activate eduroam-wide file shares at the university.
Troubleshooting
If no connection is established, this can have various causes:
- The WLAN antenna of the notebook is deactivated. Usually, it is reactivated at the push of a button.
- If there is no access point with the eduroam network in the vicinity, the location must be changed.
If problems persist, our diagnosis page may be able to help.