Windows 11
Note
Please note that we can only offer help with problems on officially supported operating systems.
When you are asked for the user data, please pay attention to upper/lower case and enter your username (no alias) including @uni-bremen.de. For security reasons, the WiFi password is not identical to the password of your university account. Students set the password automatically when activating their university account, other users have to set the WiFi password once in the Onlinetools.
Example credentials:
username@uni-bremen.de
YourWiFiPassword1234
If there is a problem, please contact us by email at wlanprotect me ?!uni-bremenprotect me ?!.de or at the IT-Servicedesk.
Setup with the configuration tool
Administration rights
The installation with the configuration tool requires administration rights at one point of the installation. If you do not have these, then skip to the manual setup a little further down, or contact your local administrator.
Step 1
Click on the Wifi/Network icon at the bottom right of the taskbar. Now click on the arrow directly next to the WiFi menu item. Next, connect to the "Uni Bremen" WiFi.
Note: You can also use your home WiFi or mobile data, then you can jump directly to step 3!

Step 2
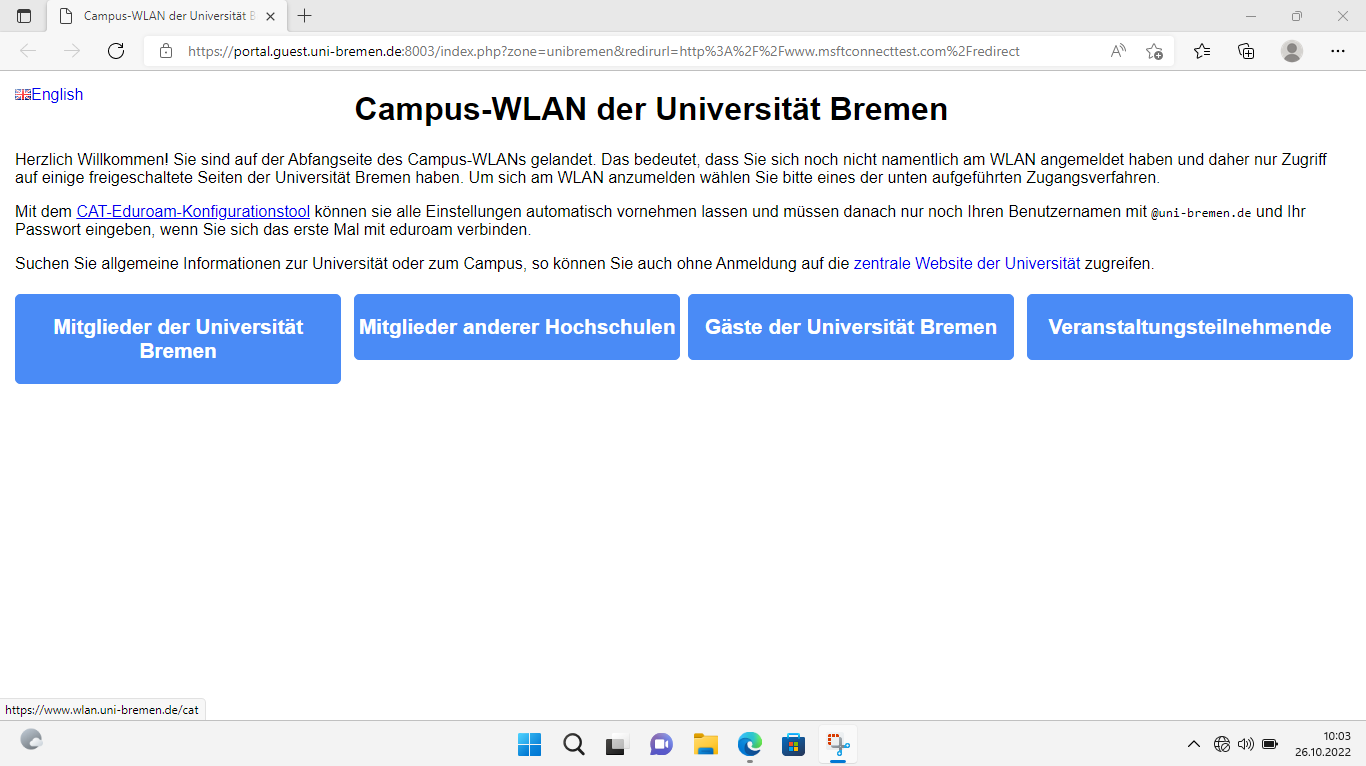
After you have connected to the WiFi "Uni Bremen", the university page shown in the picture should open automatically. On the university page click in the text above the blue buttons on the link: CAT-Eduroam configuration tool.
If the University page does not open automatically, then open a browser such as Microsoft Edge, Firefox, etc. on your own. Open a non-encrypted (http) connection like: http://neverssl.com
Step 3
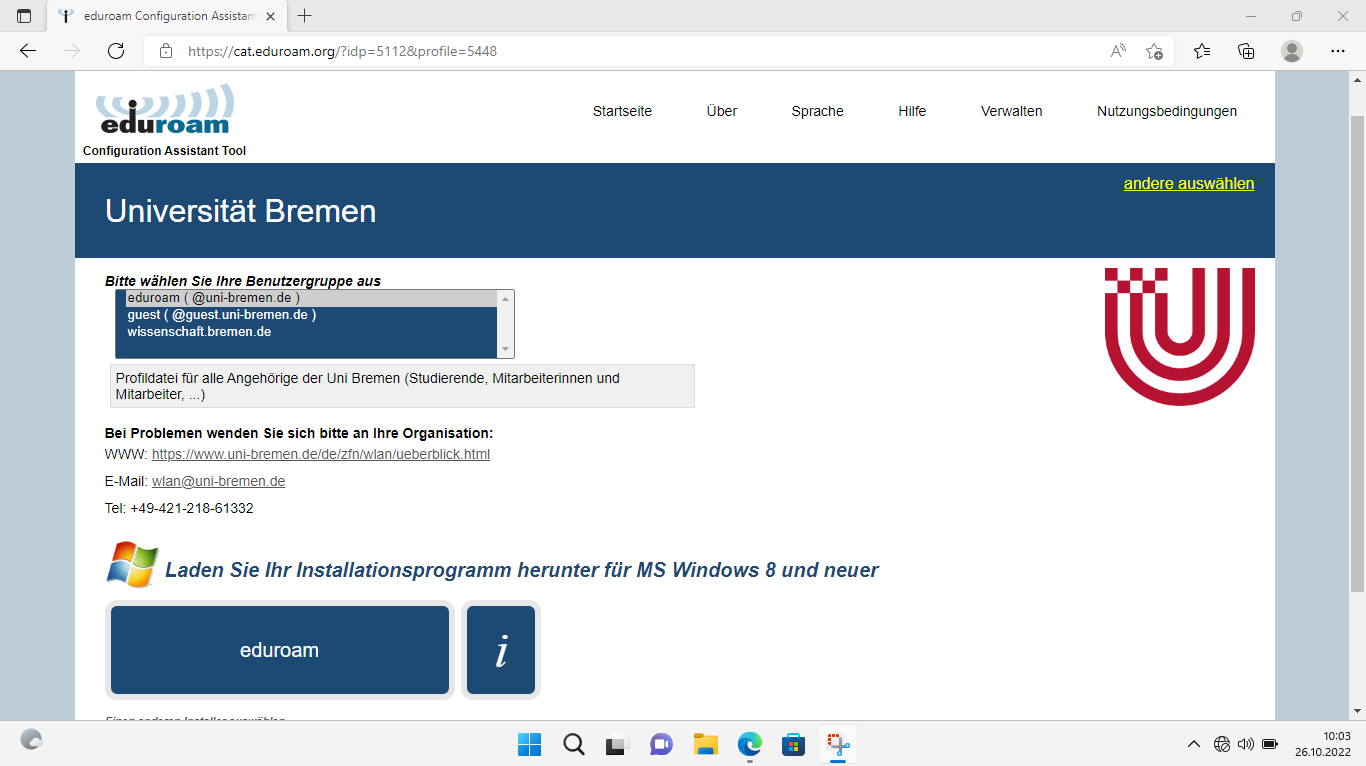
Select the user group "eduroam (@uni-bremen.de)" at the top if it is not already preselected. Next, click on the blue button "eduroam" to download the configuration program. Save the file to a location of your choice.
If you skipped the previous steps, the following link will take you to the page shown: https://www.wlan.uni-bremen.de/cat
Step 4
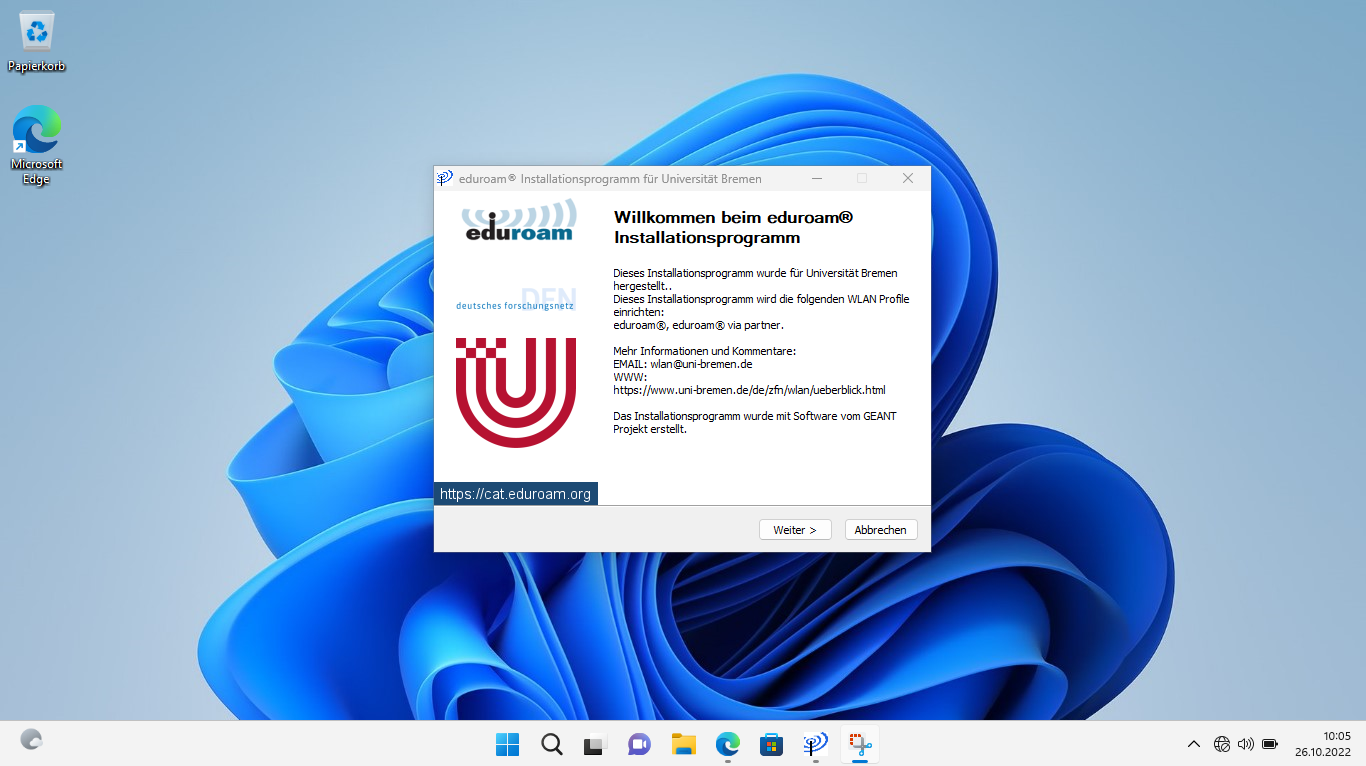
After you have successfully downloaded the configuration file, run it. As you can see in the picture, a welcome screen to the installation program will now open. Click on "Next" in the window. In the next window, confirm with "OK" that you belong to the group "eduroam (@uni-bremen.de)".
Step 5
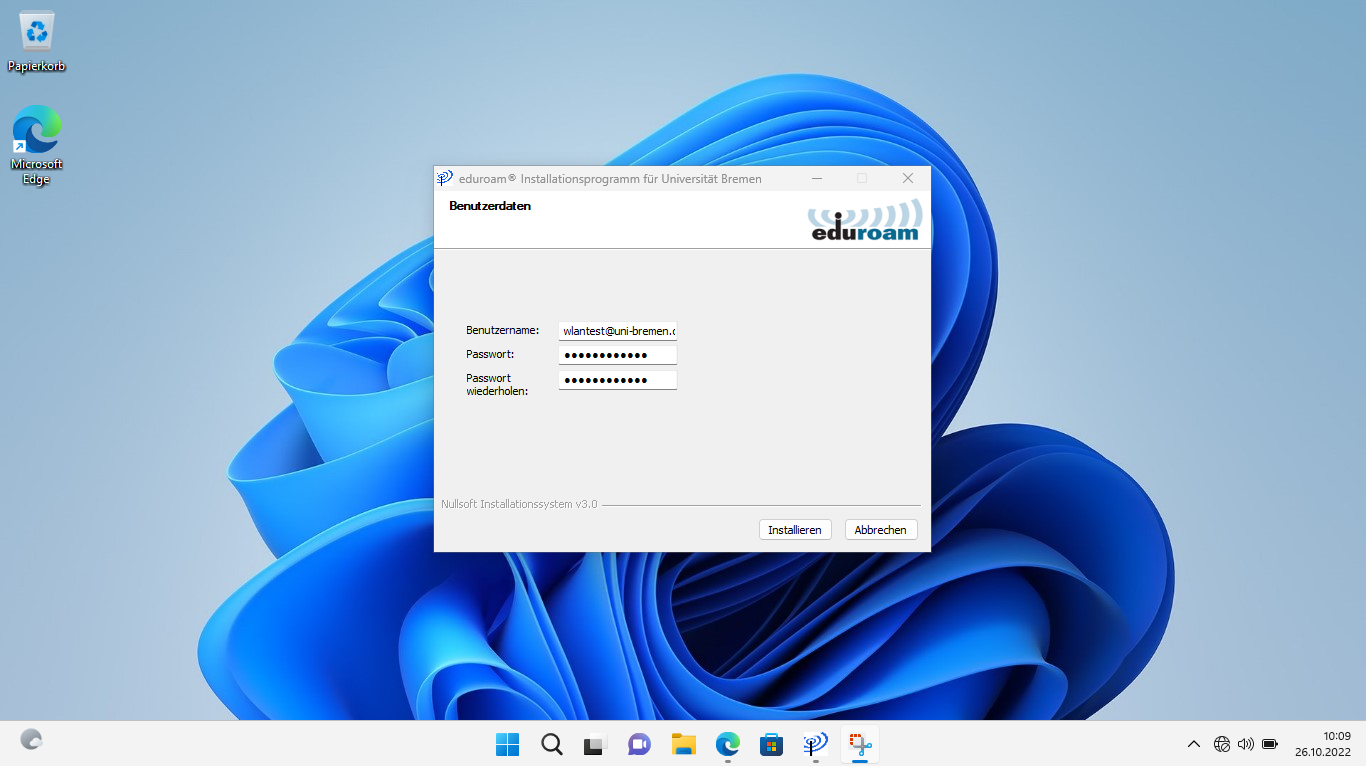
Enter your credentials now. Please note that the username contains @uni-bremen.de and that the requested password is your WIFi password.
Example:
username@uni-bremen.de
YourWiFiPassword1234
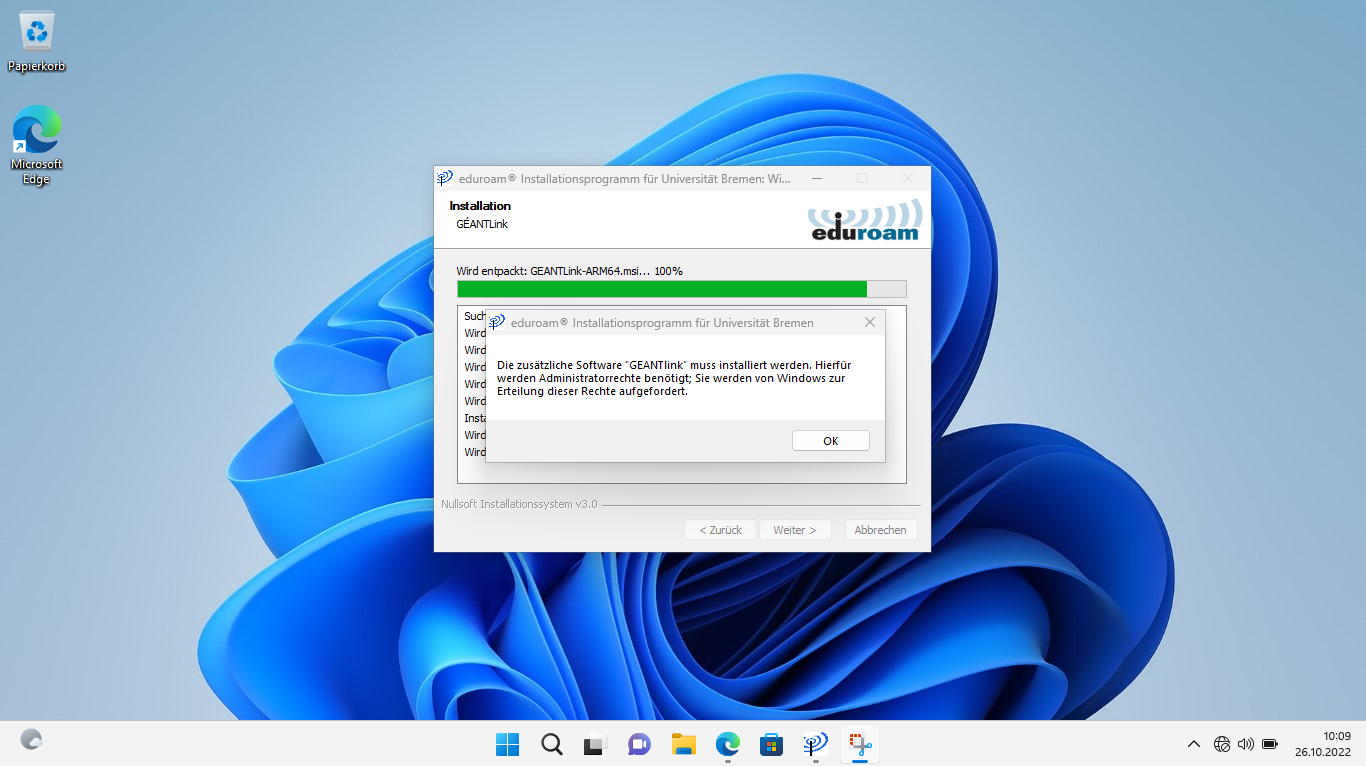
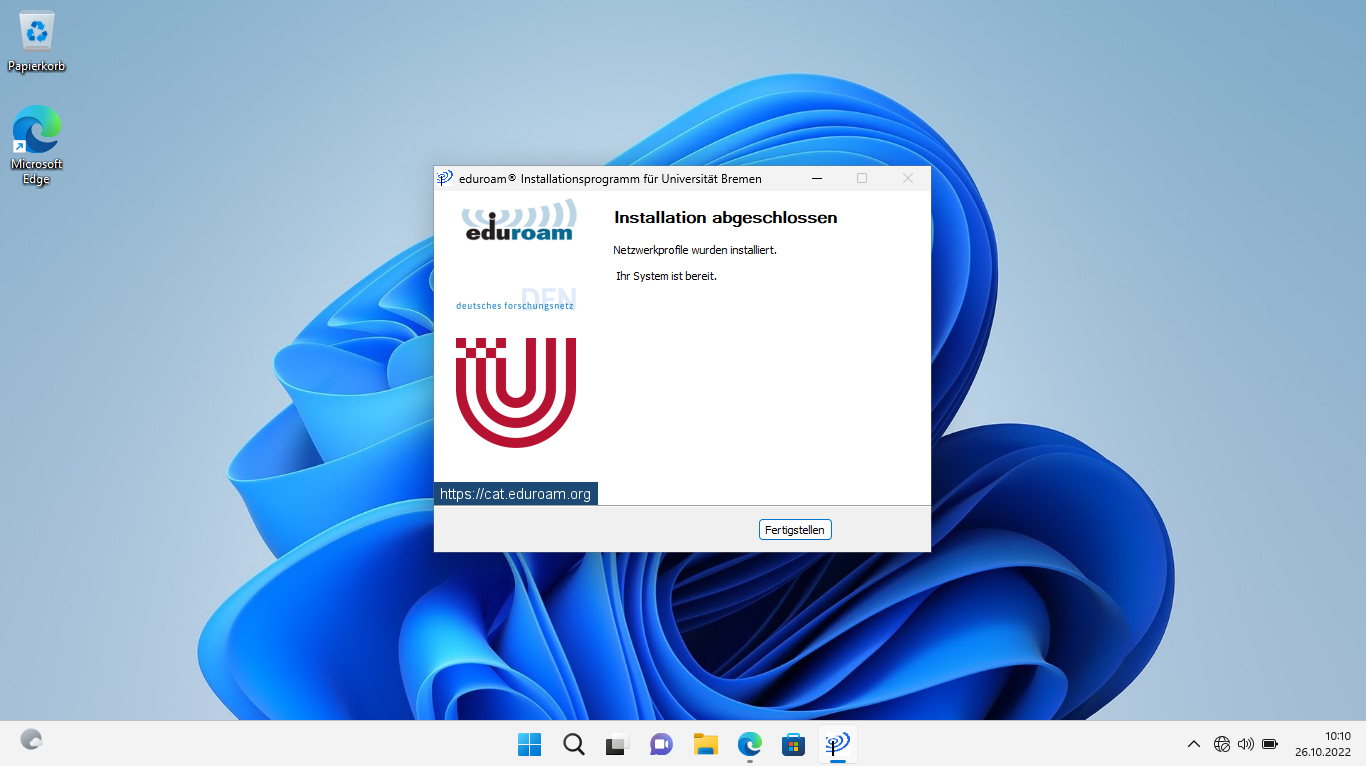
Step 6
Confirm the question whether GÉANTlink should be installed with "OK". Now you only have to wait until the installation is finished and confirm this with a click on "Finish".
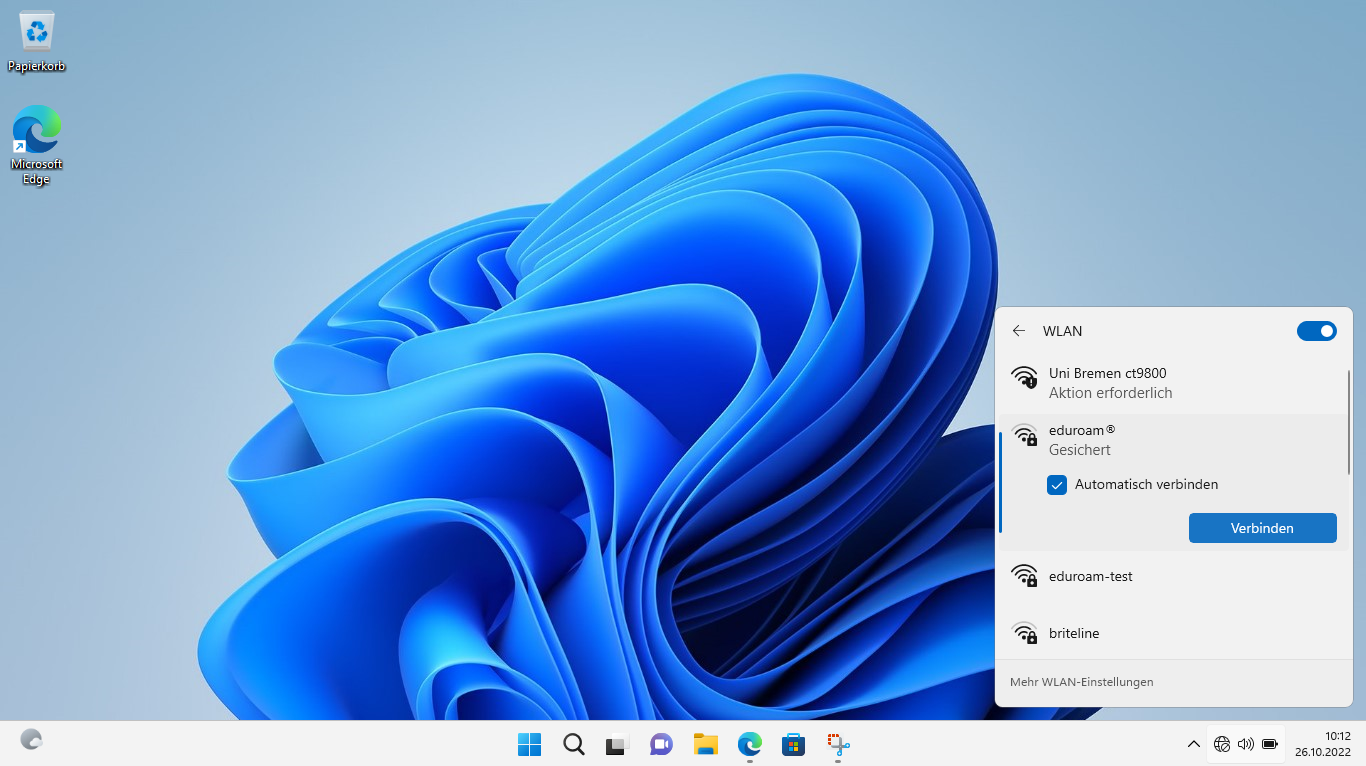
Step 7
After the installation has been completed, you can now connect to eduroam as usual. To connect to eduroam automatically when the WiFi is in range, check the "Connect automatically" box before clicking the "Connect" button. If the credentials you entered are correct, you should now be connected to eduroam. If you have problems logging in, then you can look up possible reasons for the error here:
Manual setup
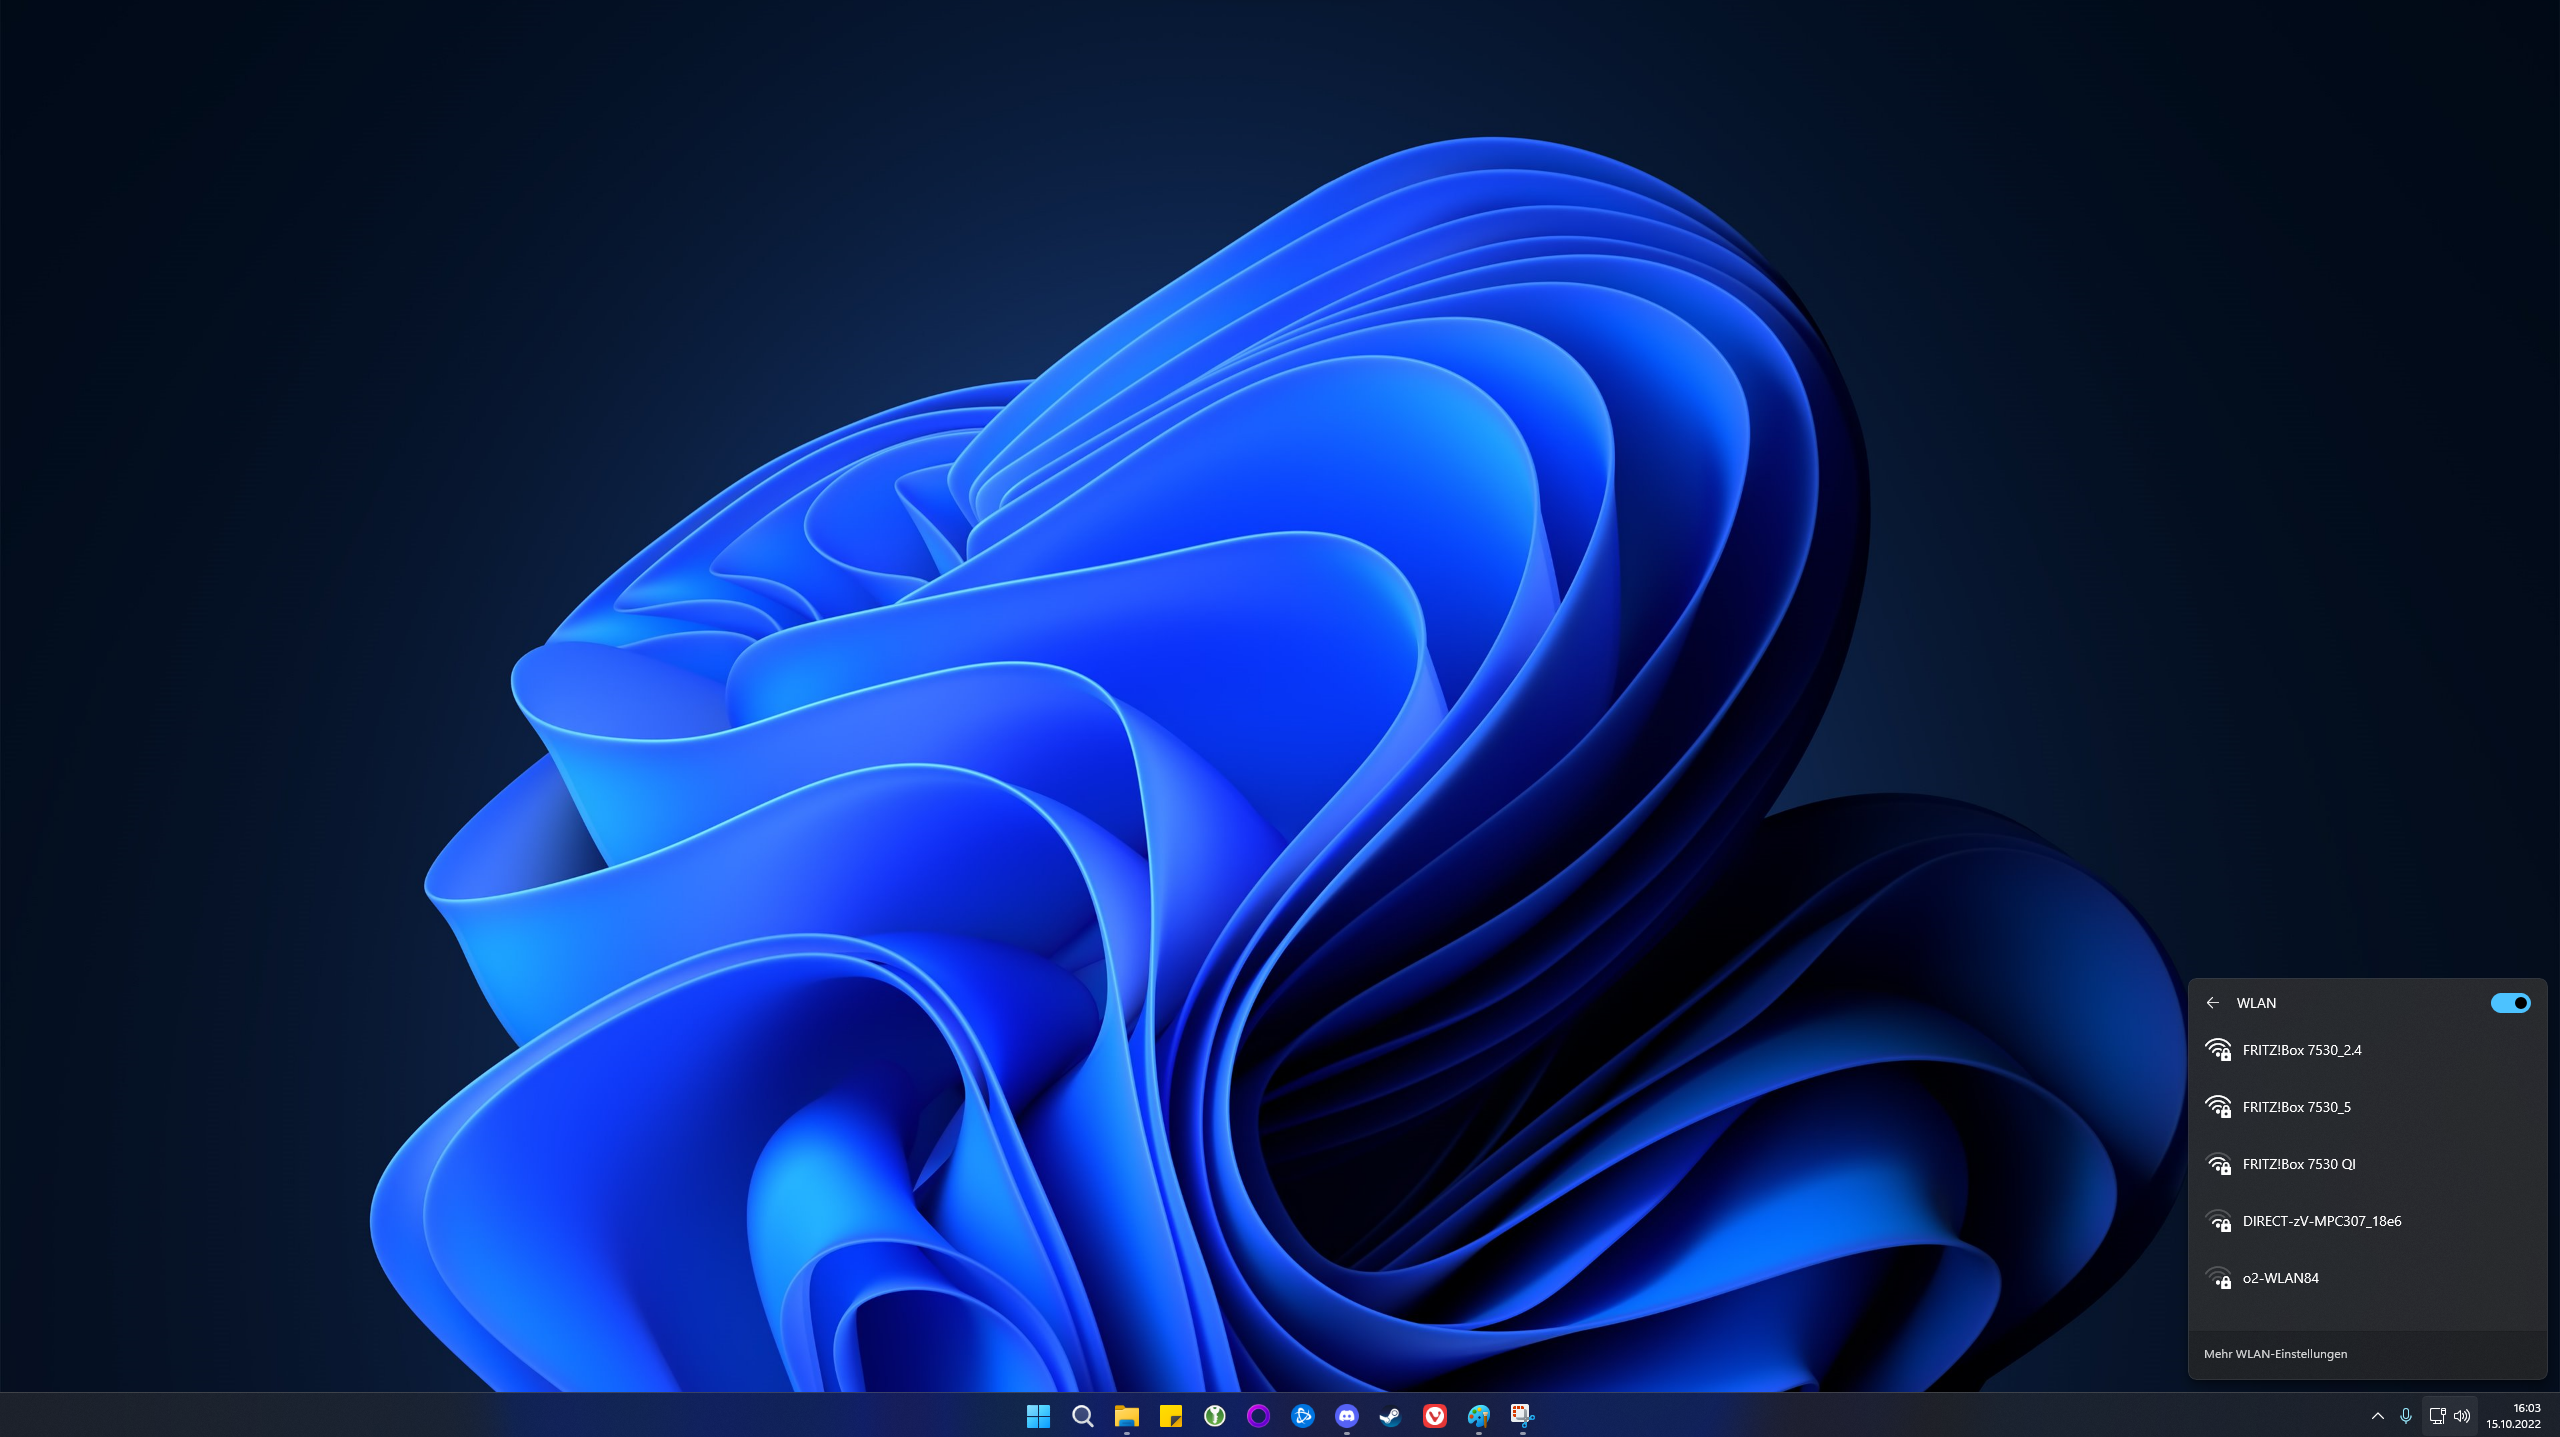
Step 1
Click on the WiFi/Network icon at the bottom right of the taskbar. Now click on the arrow right next to the WiFi menu item.
Step 2
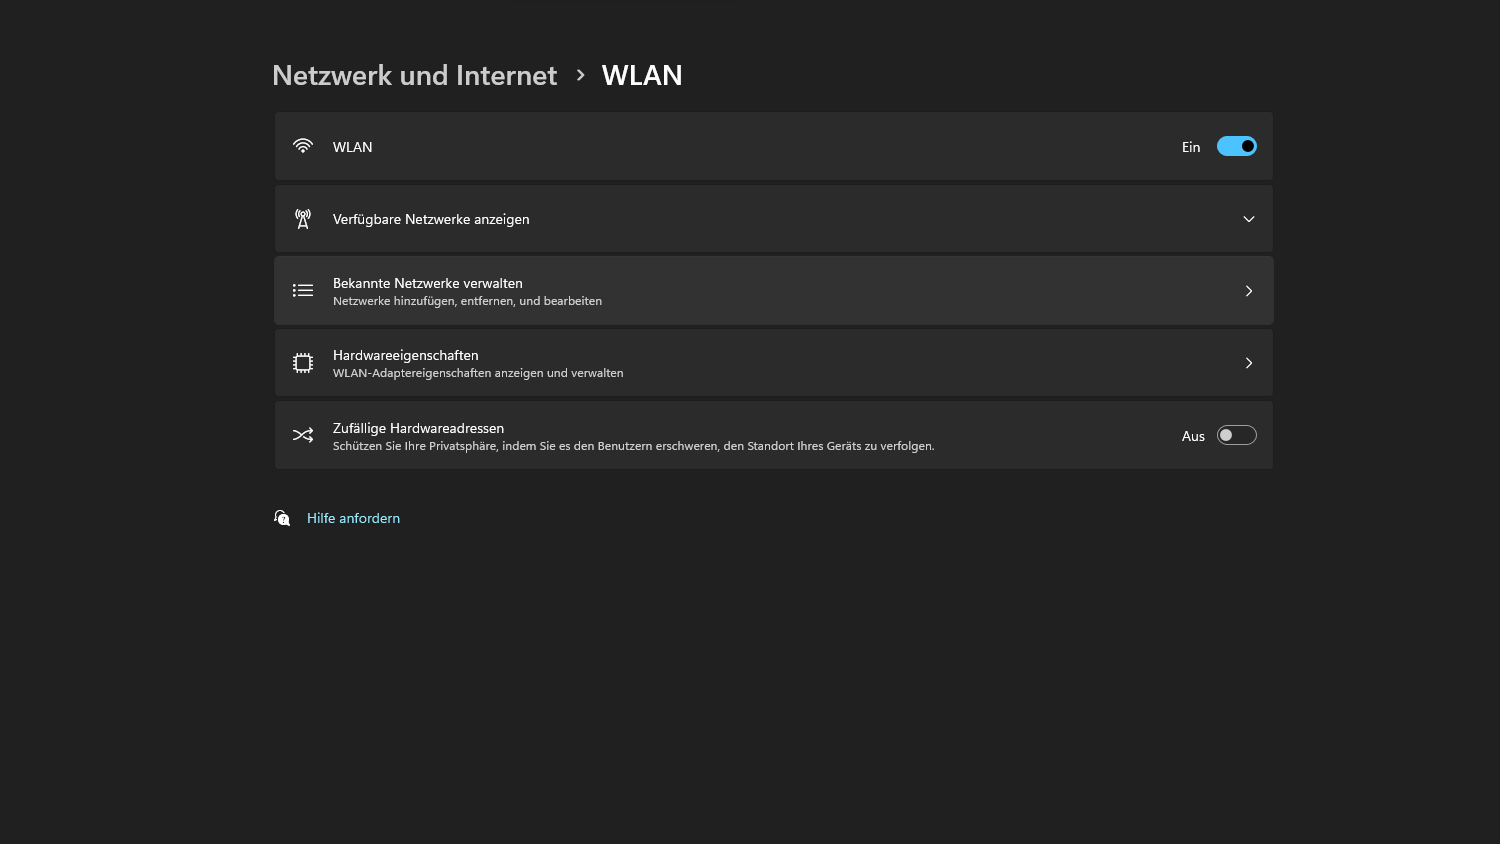
Click on the "More Wifi settings" item at the bottom.
Step 3
In the middle window, select the "Manage known networks" item. To create a new network, click the "Add network" button now.
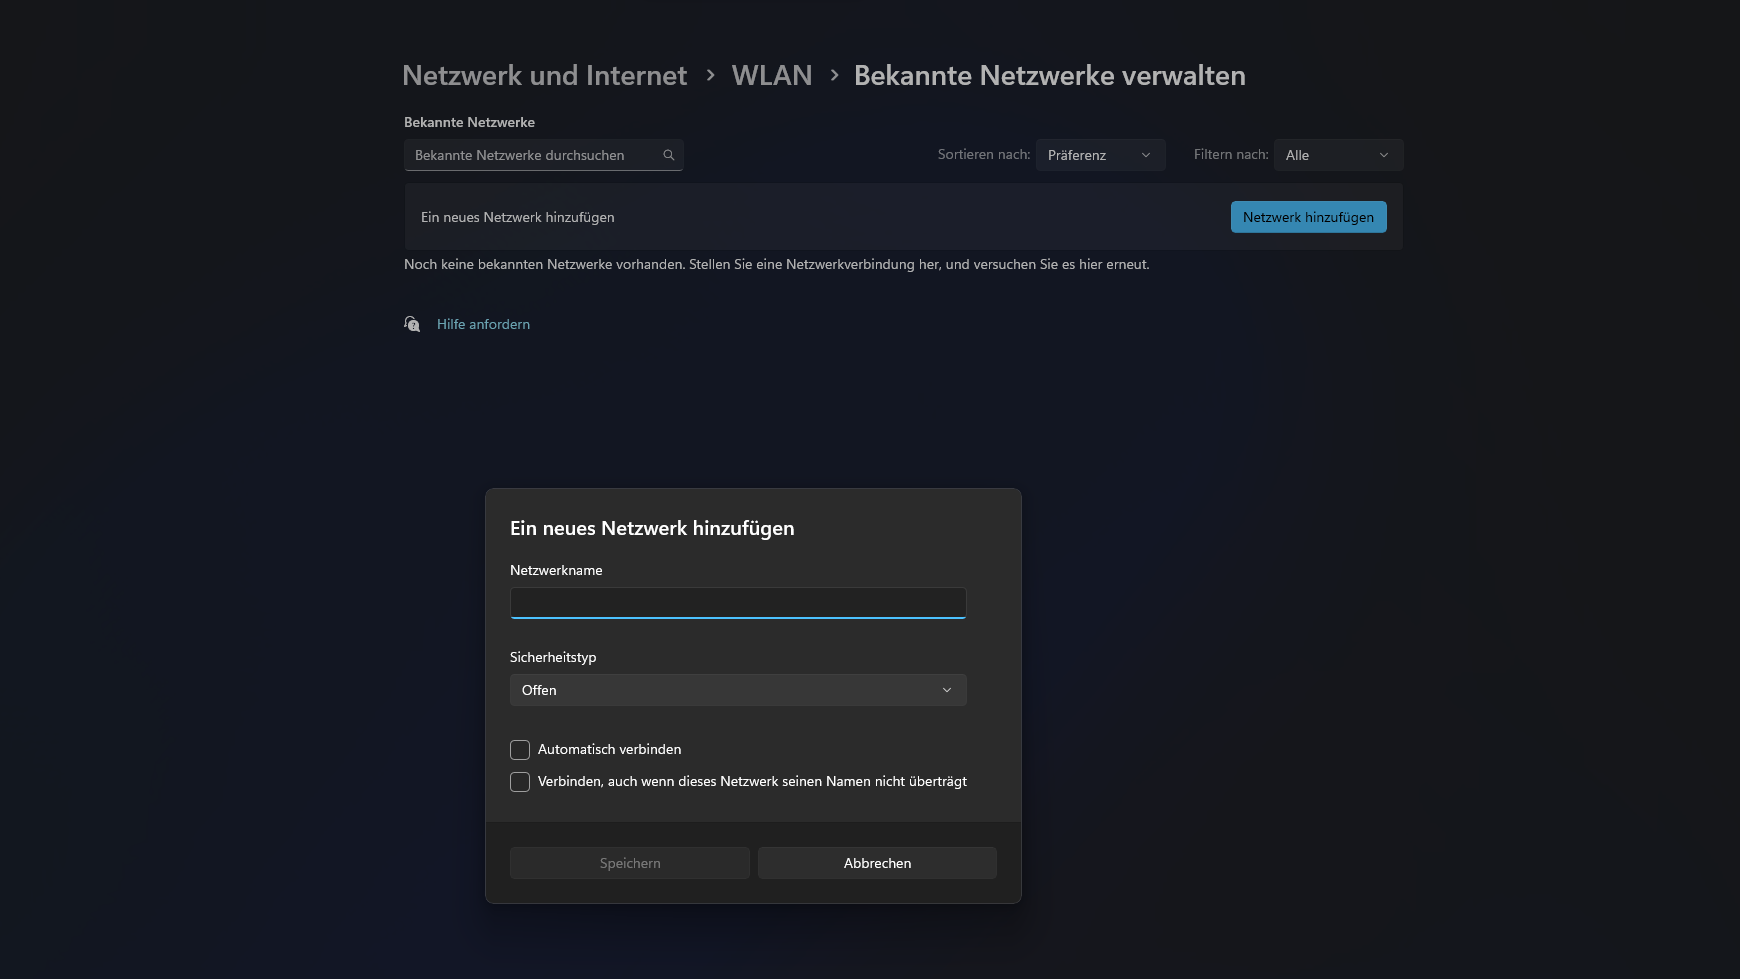
Step 4
Enter the following in the newly opened window:
1. Network name = eduroam
2. Security type = WPA2 Enterprise
3. Check Automatically connect (enable).
The last checkmark SHOULD NOT be set (disable). Now click on "Save".
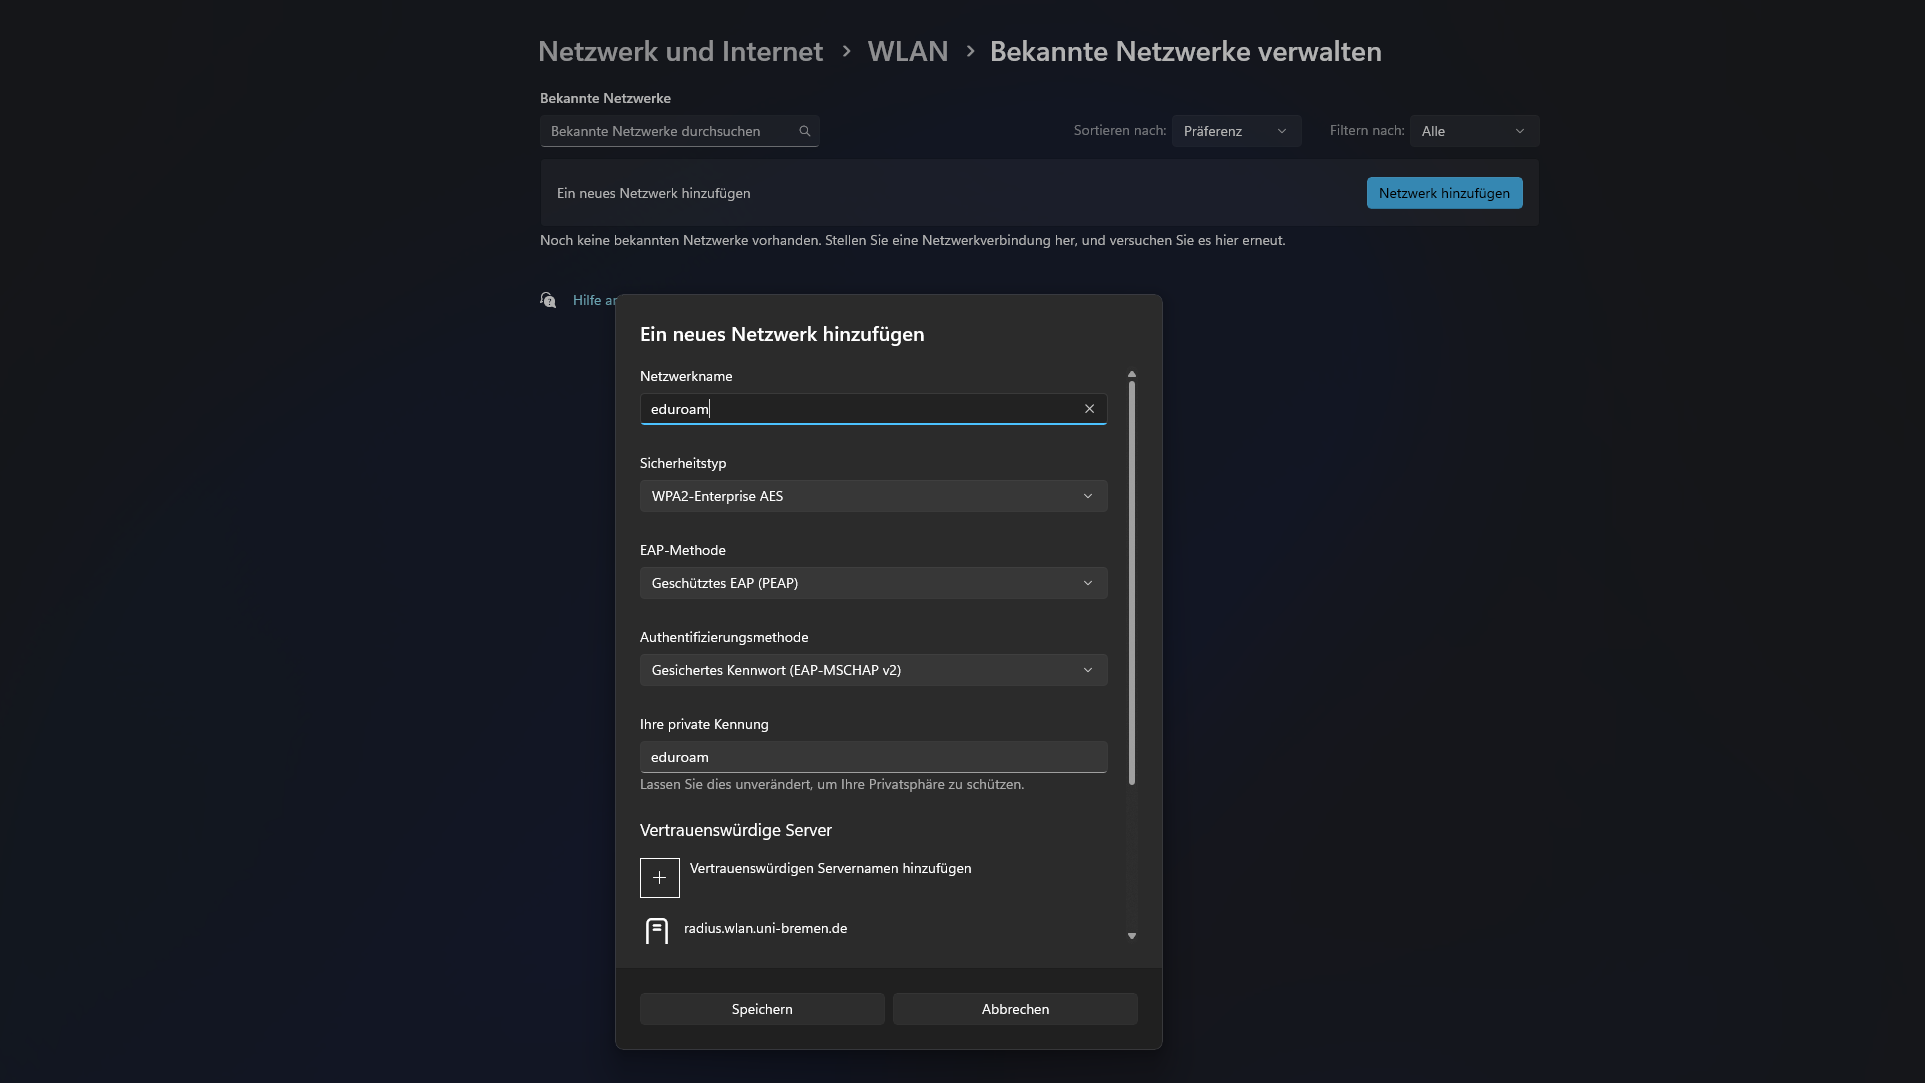
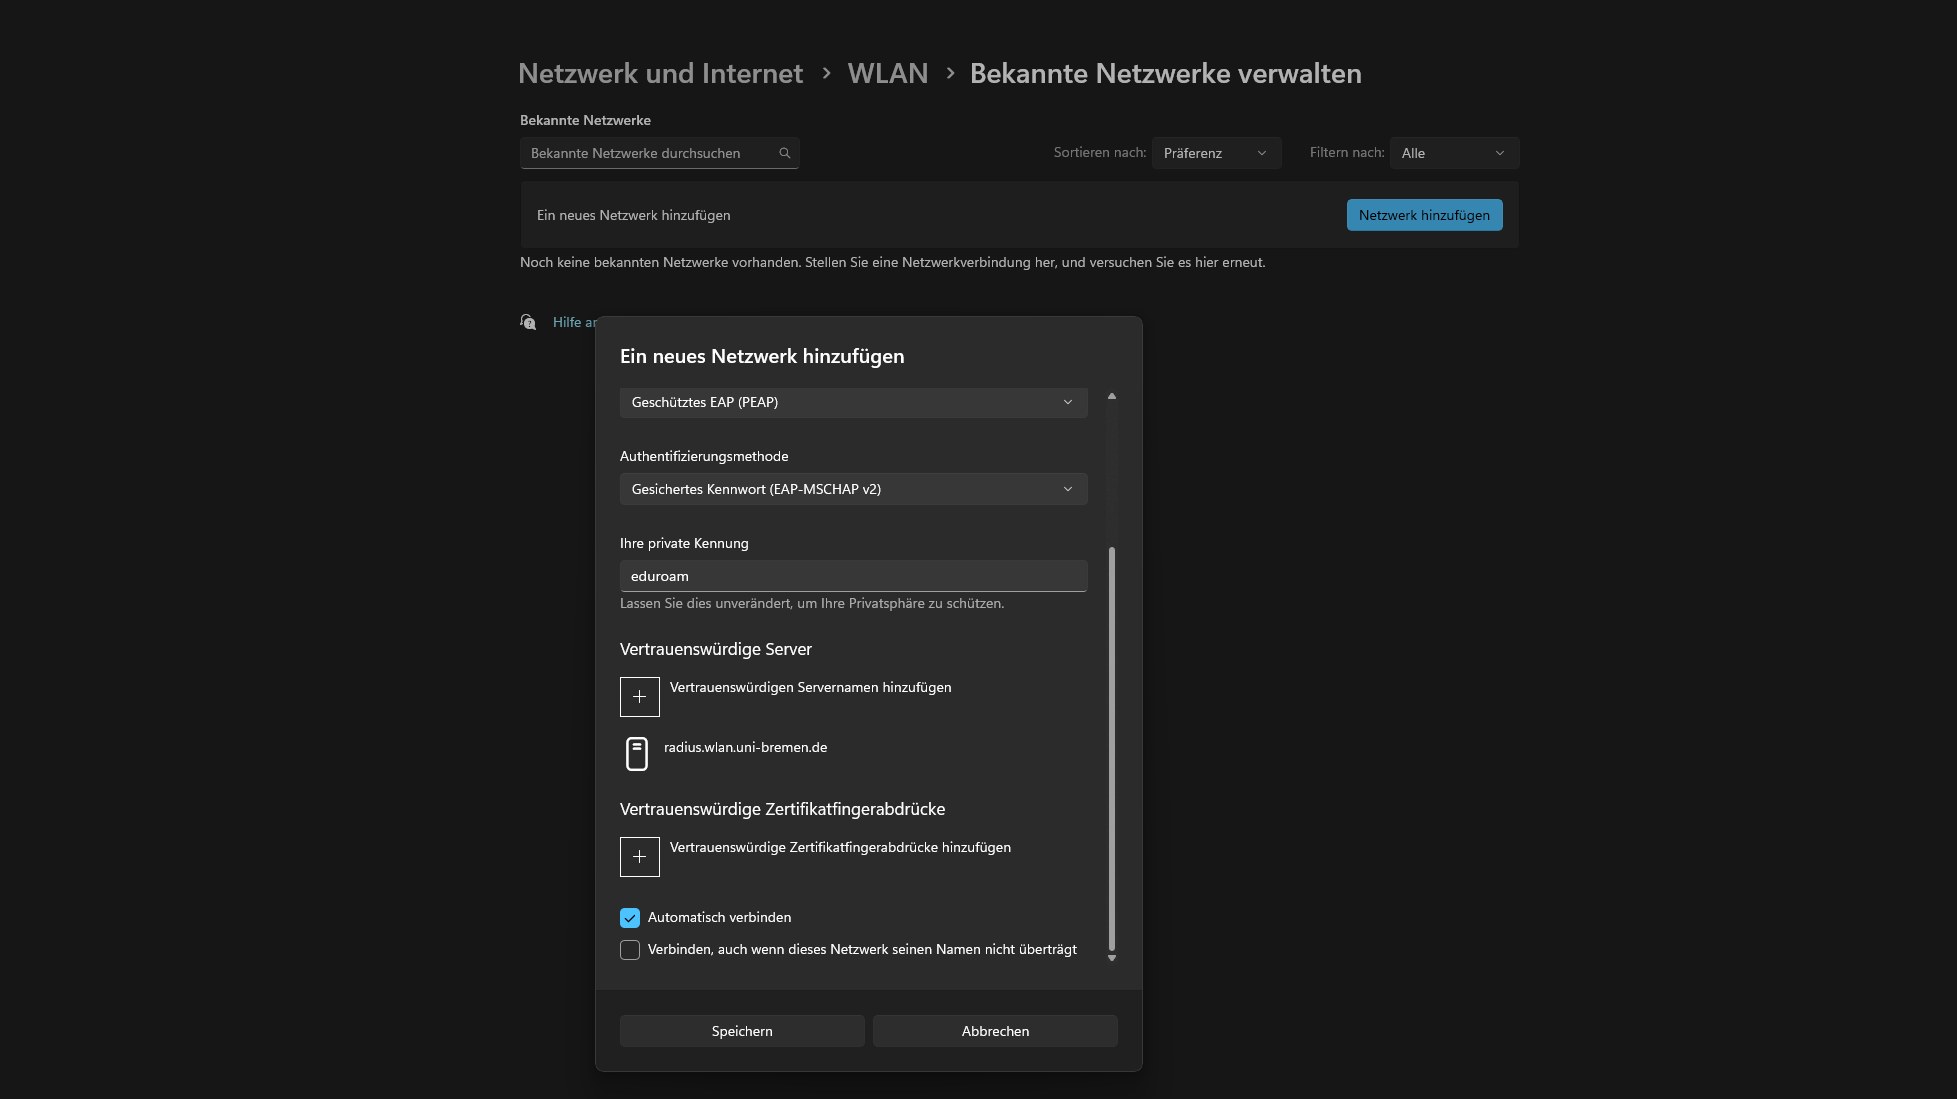
Step 5
Now enter the values according to the pictures.
1. Network name = eduroam
2. Security type = WPA2-Enterprise AES
3. EAP method = Protected EAP (PEAP)
4. Authentication method = Secured password (EAP-MSCHAP v2)
5. Your private identifier = eduroam
6. Trusted server = radius.wlan.uni-bremen.de
Trusted certificate fingerprints can be left blank.
Finally, click on "Save". You should now be able to connect to eduroam as usual
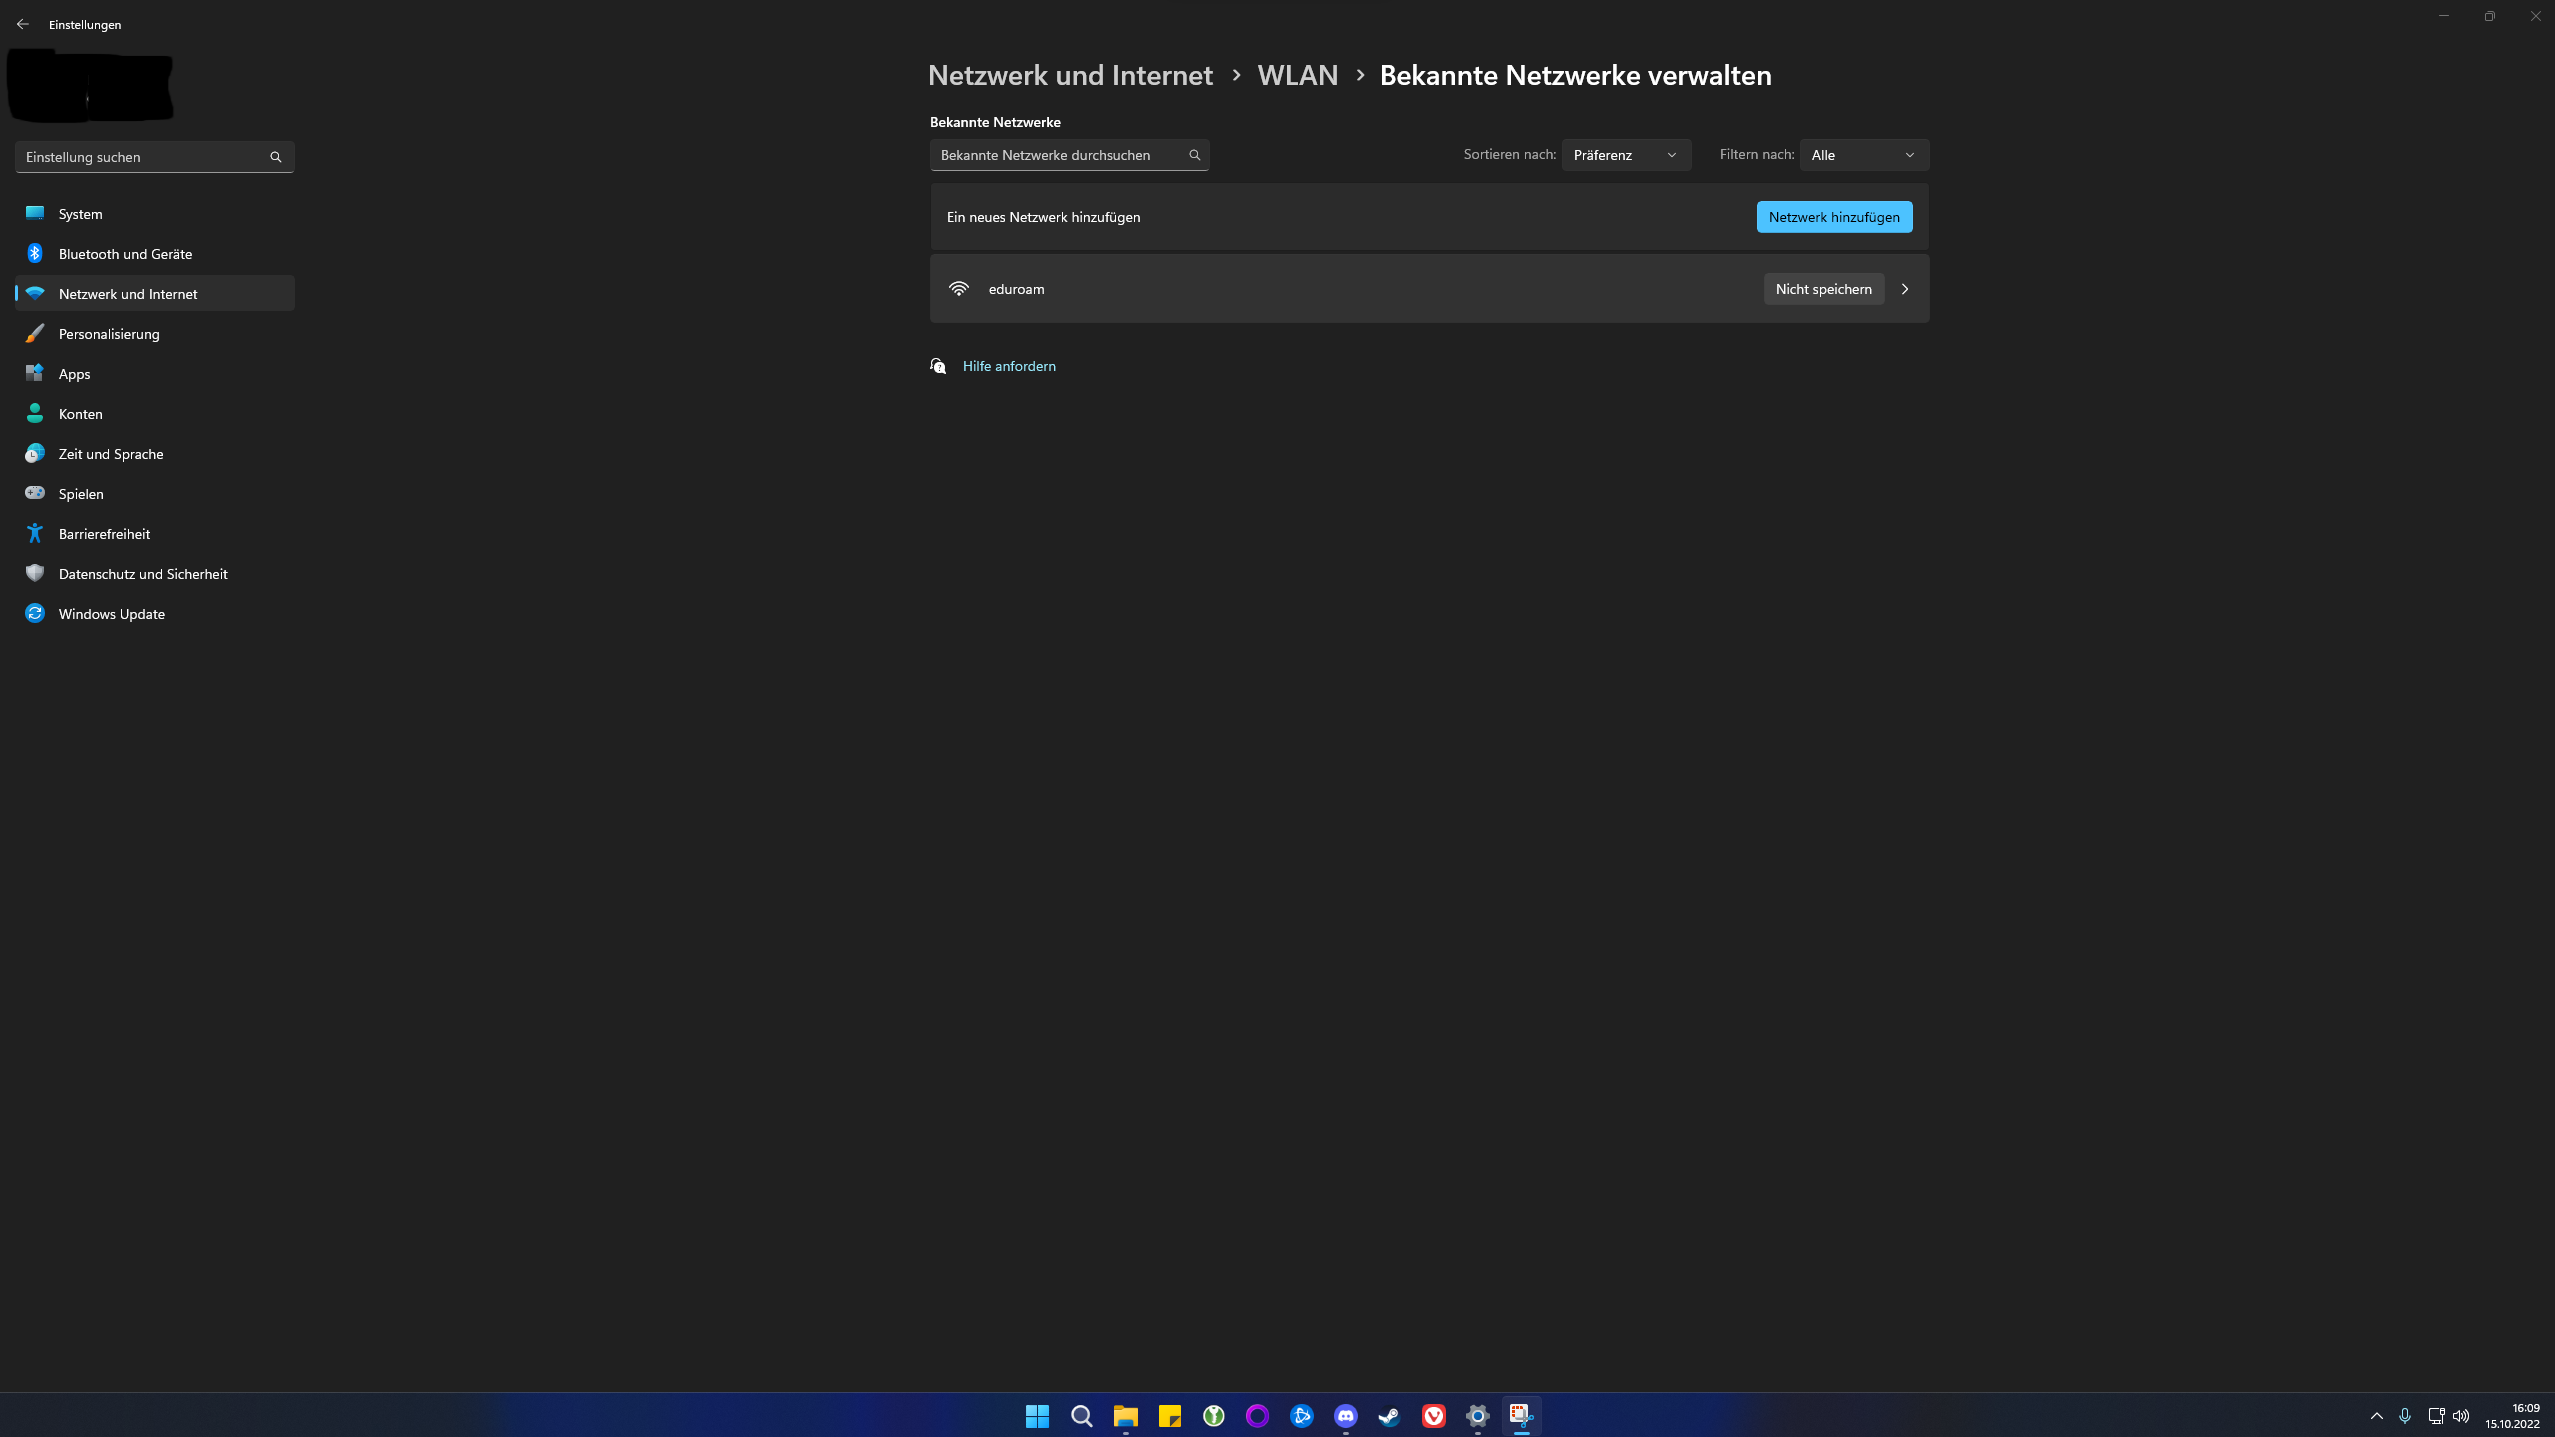
Deleting an existing connection
As shown in steps 1, 2 and 3, go to the WiFi settings and there to the known networks. There you will see the saved (known) networks. To delete such a network, simply click on the "Delete" button in the same line.