VPN with OpenConnect on Linux
Preliminary note
Troubleshooting help can be found below.
Note general
Some restricted services of the University or the State and University Library can only be used when you are on campus, so that the device you use has an address from the area assigned to the University.
To access these services from home or on the road, you must install a so-called VPN client software (Cisco Secure Client or OpenConnect) on your device once and establish a connection to the campus with the VPN client before each access to the restricted services. This means that you are "virtually" on campus and can use the services you are used to.
Please note the different types of tunnels and make sure you choose the correct tunnel.
Notes on OpenConnect and operating systems
A connection to the university VPN with OpenConnect should be possible under certain conditions. However, due to the many different variants of Linux operating systems, we cannot guarantee that it will always work. If OpenConnect does not work for you, you always have the option of installing the official Cisco client (Cisco Secure Client). You can find instructions on how to do this in the instructions section.
Your Linux operating system must support at least TLS version 1.2 and must use systemd (at least systemd 233).
These instructions have been tested with the following operating systems:
- Debian 12 (Bookworm)
- Ubuntu 22.04 (Jammy Jellyfish)
- Arch Linux (we only tested the wrapper-script)
These instructions should work if your operating system uses “apt” for package installation. Unfortunately, we cannot take all Linux variants into consideration. If these instructions do not work for your operating system variant, you can use the Cisco Secure Client as an alternative. You can find instructions for this in the instructions section.
Initial Setup - Step 1
Make sure that your computer is connected to the Internet so that the required software can be installed if necessary.
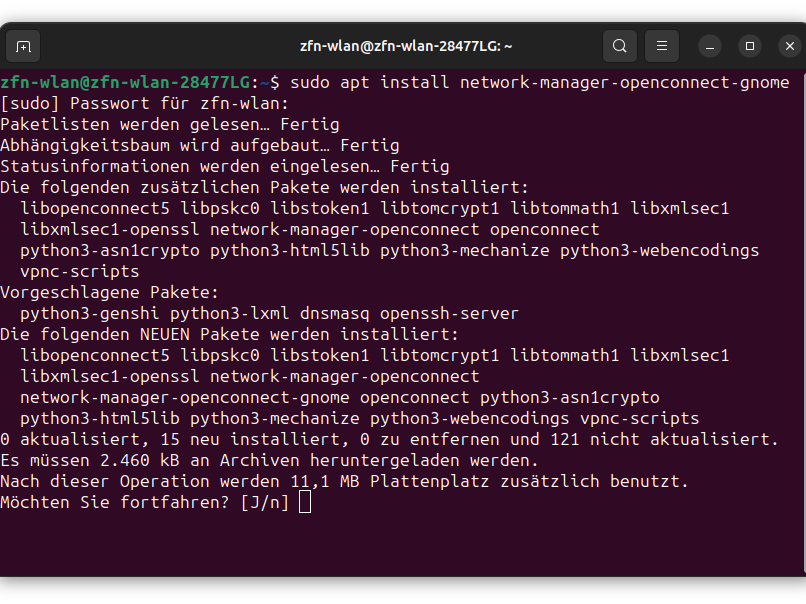
Open the terminal and type the following command:
sudo apt install network-manager-openconnect-gnome
Confirm the installation with the instruction mentioned in the terminal. Now restart your device.
Initial Setup - Step 2
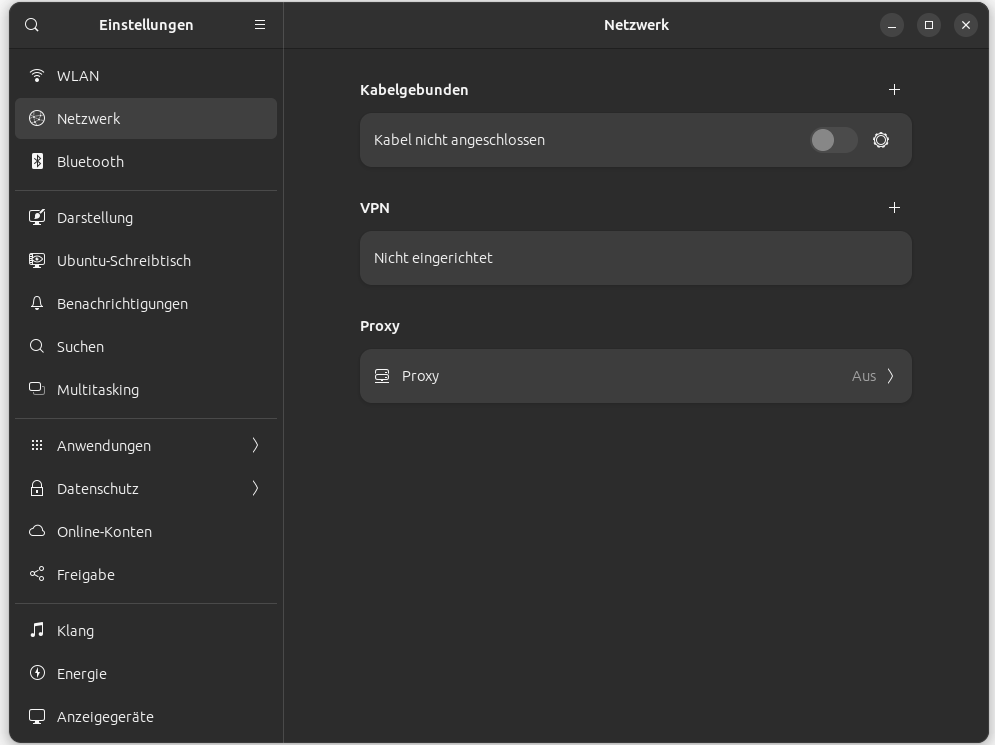
Now go to the "Settings" and open the "Network" tab. Next, click on the "+" icon next to VPN.
Initial Setup - Step 3
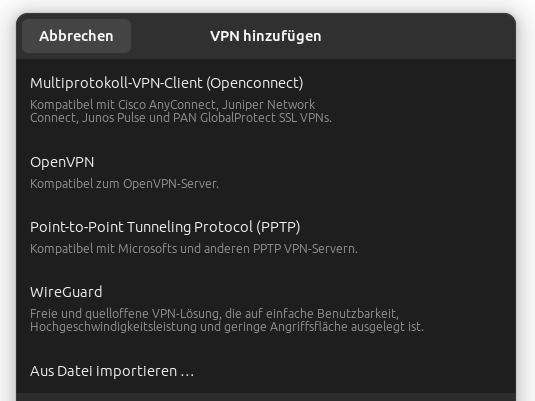
Select "Multi-protocol VPN Client (Openconnect)" as the menu item.
Initial Setup - Step 4
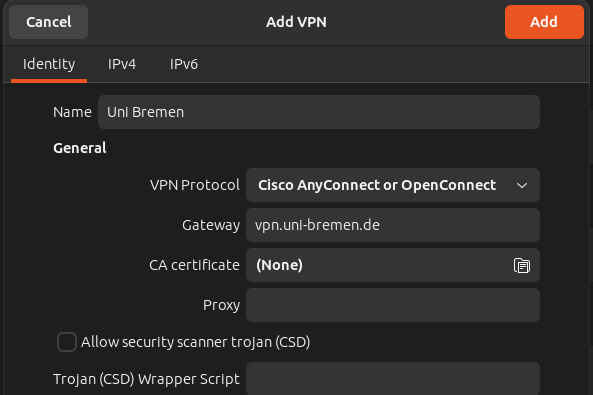
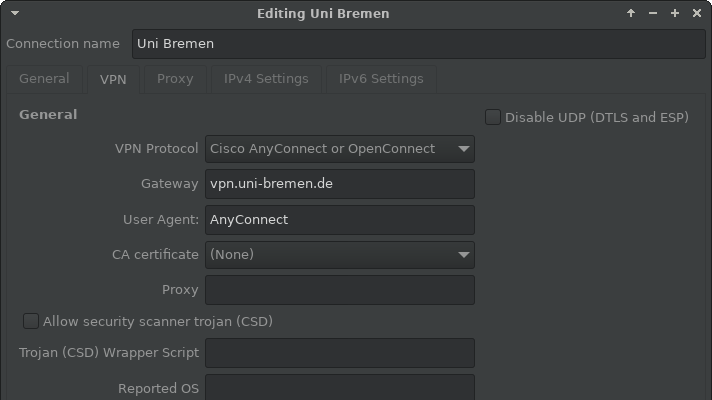
In this window you can now enter the details of the VPN endpoint.
- The name of the connection is freely selectable
- The gateway should be named "vpn.uni-bremen.de"
- The value called "UserAgent" (if available) must be set to "AnyConnect"
- Please make sure to spell it correctly "AnyConnect"
- All other values can remain at default
Now click on "Add" in the upper right corner.
The right image is an example of a configuration where the "UserAgent" field is present.
Initial setup - Step 5
Under Debian 12 and Ubuntu 22.04. there is a bug in OpenConnect (bug report) that prevents a successful connection. You can install the following workaround.
Please note that we have only tested the workaround with Debian 12 and Ubuntu 24.04. With other distributions and versions it may be that the workaround is not necessary or does not work!
Open the file /usr/bin/openconnect with an editor (e.g. vim):
sudo vim /usr/bin/openconnect-wrapper
Now add the following content to the file
#! /usr/bin/env bash
PATH=/sbin:/bin:/usr/sbin:/usr/bin

exec /usr/bin/openconnect-orig --useragent 'AnyConnect-compatible OpenConnect VPN Agent' --gnutls-priority "NORMAL:-VERS-ALL:+VERS-TLS1.2" "$@"
Now make the file executable:
sudo chmod 0755 /usr/bin/openconnect-wrapper
Then create the following folder and file:
sudo mkdir /etc/systemd/system/NetworkManager.service.d/
sudo vim /etc/systemd/system/NetworkManager.service.d/override.conf
Write the following content to this file:
[Service]
BindPaths=/usr/sbin/openconnect:/usr/bin/openconnect-orig
BindPaths=/usr/bin/openconnect-wrapper:/usr/bin/openconnect
Then please restart the computer.
(Simply reloading the services is often not enough as old routes or TUN devices may be retained. Only a restart will reliably remove them).
This should make it possible to connect to the Uni Bremen VPN despite the bug.
If you are still using the “old” script for setting the user agent in /usr/bin/openconnect, please delete it.
(Warning! Don't delete /usr/sbin/openconnect !)
Connect - Step 1
Go to "Settings" and then to the "Network" tab.
Connect- Step 2
Now click on your created VPN profile, previously named "Uni Bremen".

Connect - Step 3
Select the correct tunnel type under "Group".
Enter the credentials of your university account under Username and Password and click on Login.
If you have two-factor authentication (2FA) enabled, please enter your one-time password/OTP in the second field at the bottom labelled ‘Password’.
Unfortunately, the two fields in OpenConnect have the same name (the first password is your university account password, the second is the one-time password for 2FA).
If you have not set up two-factor authentication (2FA), please leave the lower ‘Password’ field blank.
If the second ‘Password’ field is not visible, you can ignore this paragraph.
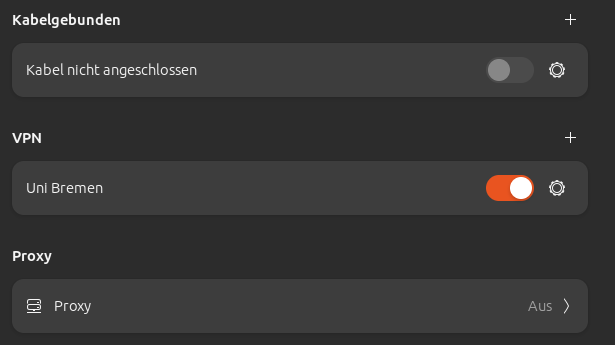
As you can see in the last picture, a successful connection is marked by a colored button (here highlighted in orange).
Troubleshooting
Here you will find common errors in connection with Openconnect under Linux.
I have successfully established a VPN connection, but now I cannot use the library's services?
If you want to use services that are activated for the network area of the University of Bremen but are not “hosted” in the university's network area (publishers are an example here), you must change the group from “Tunnel-Uni-Bremen” to “Tunnel-all-Traffic” when establishing the connection. For a detailed explanation, please read the page VPN tunnel types.
ATTENTION: With this option, all data traffic is now routed through the tunnel. Please only leave the tunnel activated with this option as long as it is required for working.
The instructions do not work for me
The instructions were written for the two very common Linux variants “Ubuntu LTS” and “Debian”. Unfortunately, we cannot provide instructions for all Linux variants. If you are using a different Linux distribution, you can try to adapt the instructions to your variant (e.g. use rpm instead of apt). However, we cannot guarantee that this will work and in this case we cannot offer support. If these instructions do not work for you, you also have the option of using the official Cisco Secure Client. You can find instructions here.